 (1)")

Entering a room dominated by vertical 1970s paneling often feels akin to stepping into a subterranean cavern. The material seems to swallow ambient light. It imposes a heavy visual weight on the entire living space. For decades, the immediate architectural reflex was simply to initiate demolition. Tearing boards off the wall, however, presents massive logistical headaches.

Removing glued panels usually destroys the underlying drywall, necessitating an expensive and chaotic room rebuild. There is a far less destructive approach. Understanding exactly how to make wood paneling look nice could save you thousands of dollars while preserving a room’s underlying structural integrity.
We will explore sophisticated methods for transforming these dated vertical boards into intentional architectural features. This comprehensive guide covers the necessary surface assessment, rigorous preparation protocols, and specific finishing techniques required to bring a dark room into the modern era.
Assessing the State of Your 1970s Paneling
Before purchasing primer or sandpaper, you must understand the material you are actually working with. Not all wall coverings from the mid-twentieth century share the same manufacturing DNA. Treating a cheap photo-laminate exactly like solid pine usually leads to a peeling disaster. You need a quiet, analytical evaluation of the wall’s current state. This preliminary diagnostic phase prevents catastrophic chemical reactions later in the process.
Identifying Solid Wood vs. Veneer
The first step involves determining the physical composition of the boards. Some historical homes feature authentic, solid wood planks. These possess distinct organic grain patterns and naturally occurring imperfections. More frequently, however, you will encounter engineered sheet goods. This material is typically constructed from a thin wood veneer or a printed paper layer glued over a composite core.
You might test this by discreetly scratching an inconspicuous corner near the floorboard with a sharp utility knife. If the top layer scrapes off easily to reveal a compressed core, you are likely dealing with a synthetic laminate. Solid wood allows for aggressive mechanical sanding. Laminate sheets demand a far gentler chemical approach to avoid tearing the fragile printed surface. Attempting to sand a paper laminate will instantly destroy the faux grain, leaving a fuzzy, unpaintable texture behind.
Evaluating Structural Integrity
Beyond the surface material, the physical attachment to the wall requires close inspection. Moisture damage poses a significant threat to older sheet goods. Press your hands firmly against the lower sections of the boards, paying specific attention to areas near windows or exterior foundation walls. If the material feels spongy or bows inward under light pressure, it might indicate latent water damage. This structural weakness could also suggest compromised adhesive behind the board. Painting over decaying wood is entirely futile.
You must secure any loose panels with finishing nails. Any actively rotting sections must be surgically removed and replaced before introducing wet primers to the environment. Furthermore, check for warping. Severe temperature fluctuations over decades may cause thin veneer sheets to buckle outward, creating wavy walls that paint will only highlight.
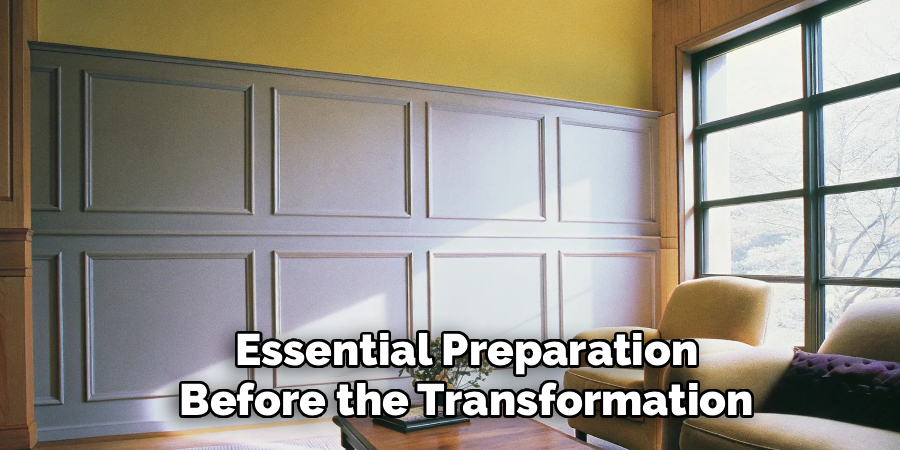
Essential Preparation Before the Transformation
The actual application of paint or stain is merely the brief, final act of this project. The ultimate longevity of your renovation rests entirely on the preparation phase. Skipping these tedious steps might save time initially. It will almost certainly guarantee premature peeling down the road. Proper preparation establishes the chemical foundation for a permanent finish.
The Critical Cleaning Phase
Wall surfaces accumulate an astonishing amount of environmental grime over fifty years. Cooking oils, airborne dust, and historical cigarette smoke create a stubborn, invisible barrier. Modern paint physically cannot adhere to this slick film. Standard household dish soap generally fails to cut through this polymerized layer. You must wash the entire surface systematically with a specialized agent.

Using a heavy-duty degreaser, such as a synthetic trisodium phosphate substitute, wipe down every vertical inch. You need a coarse synthetic sponge for this task. Pay special attention to the vertical grooves. These recessed channels act as permanent traps for hardened dirt. Once scrubbed, you should rinse the wall entirely with clear water. Allow the room to dry completely. The surface must feel entirely devoid of surface grease before any coating is applied.
To Fill or Not to Fill the Grooves
At this juncture, you face a major aesthetic decision regarding the physical topography of the wall. You must decide whether to retain the vertical lines or attempt to create a smooth, seamless barrier. Leaving the grooves intact requires far less labor. When painted, these vertical lines often mimic the appearance of high-end beadboard or modern architectural shiplap. This adds a subtle, rhythmic texture to the room.
If you prefer a completely flat surface, you must fill every single channel manually. This process involves pressing drywall joint compound into the grooves with a flexible metal putty knife. You wait for the compound to dry entirely. Then, you sand it flush with the surrounding surface. Because the wet compound shrinks as moisture evaporates into the air, this typically requires two or three separate applications per groove. It is a profoundly dusty, physically exhausting endeavor. The fine sanding dust will inevitably infiltrate your home’s ventilation system if not properly contained. Many homeowners find that simply painting over the existing grooves yields a highly sophisticated result that feels far more intentional than a flat drywall substitute.
The Primary Methods: How to Make Wood Paneling Look Nice
Once the surface is analytically clean and structurally sound, the visual transformation begins. The chemical method you choose dictates the final atmosphere of the space. There is no single correct approach here. The optimal path depends largely on the specific type of material you identified during your initial assessment. Here is an exploration of how to make wood paneling look nice using three distinct, highly effective finishing techniques.
Method 1: The Power of Opaque Painting
Applying a solid coat of opaque paint remains the most popular intervention. It instantly neutralizes the oppressive brown tones holding the room hostage. This method works exceptionally well on cheap laminate and veneer panels that possess no inherent organic beauty to preserve. The secret to an enduring painted finish lies almost entirely in the primer selection. You cannot apply standard latex wall paint directly over a slick, varnished finish. It will slide off like glass water, easily scratching off with a passing fingernail months after drying.
You must roll on a high-adhesion bonding primer first. Shellac-based primers are particularly effective for this specific challenge. They bite aggressively into the glossy surface. Furthermore, shellac permanently blocks any underlying wood tannins from bleeding through the final coat and turning your crisp white paint a sickly yellow. These primers emit strong odors, so heavy ventilation is mandatory during application.
After the primer cures, apply two thin layers of a high-quality acrylic-alkyd enamel. Using a short-nap foam roller helps minimize unsightly brush strokes across the flat sections. A high-quality, angled synthetic brush ensures the paint reaches deeply into the dark vertical grooves. A soft, warm white or a deep, moody navy blue often turns a basement eyesore into a striking, sophisticated library wall.
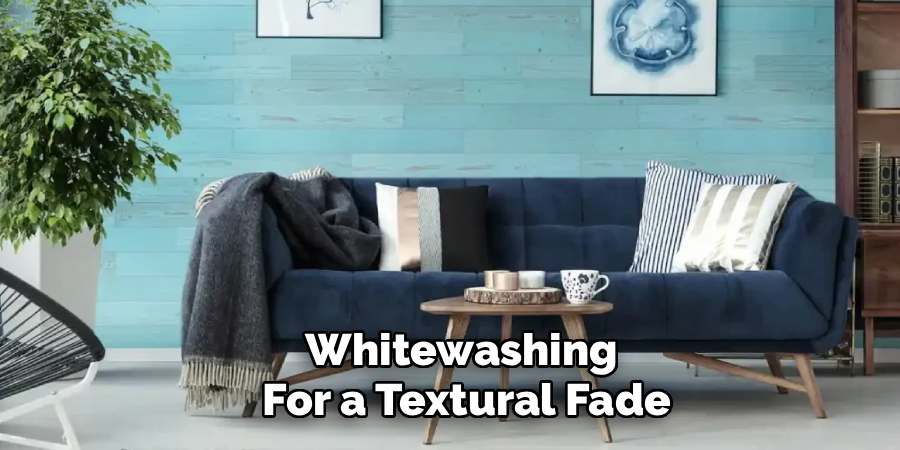
Method 2: Whitewashing for a Textural Fade
If your room features solid wood boards with an attractive, organic grain, hiding that natural texture under opaque enamel might feel like a missed architectural opportunity. Whitewashing offers a compelling, translucent alternative. This technique mutes the harsh orange coloring while allowing the organic knots and natural grain patterns to remain faintly visible. It creates a weathered, historical patina rather than a plastic shell.
You create a whitewash by diluting standard white water-based paint with tap water. The exact mathematical ratio depends entirely on the level of opacity you desire for the room. A mixture consisting of half paint and half water generally provides a moderate, chalky fade. Brush this thin, watery liquid onto the boards in small, manageable sections. Before the wash has the opportunity to dry completely, take a clean cotton rag and gently wipe away the excess liquid.
The diluted white pigment settles permanently into the deepest parts of the grain. This leaves a soft, coastal appearance that feels highly organic. It brightens the room considerably without erasing the material’s structural history. Because water raises the grain of raw wood, you may need to lightly sand the wall with a fine-grit block after the whitewash dries to restore a smooth tactile feel.
Method 3: Stripping and Restaining for a Natural Aesthetic
Occasionally, you might uncover exceptionally high-quality solid timber hidden beneath decades of yellowing polyurethane varnish. Knotty pine and cedar were sometimes utilized in premium mid-century installations. In these rare instances, stripping the original protective finish and applying a modern, muted stain could yield a stunning result. This is undeniably the most labor-intensive option available to you.
You must apply a caustic chemical stripper to dissolve the old varnish entirely. The stripper reacts with the historical polymers, turning the hard finish into a bubbling gel. You then scrape the resulting sludge away with a plastic putty knife. Following the chemical extraction, you must neutralize the wood with mineral spirits to stop the chemical reaction.
You then sand the raw boards to open the microscopic cellular pores. Once the raw timber is finally exposed, you can apply a light, gray-toned stain. Matte, water-based sealers protect the wood without adding the artificial, plastic gloss characteristic of older mid-century finishes. A wall of raw, pale pine introduces immense physical warmth and a distinctly modern, Scandinavian feel to an otherwise sterile space.
Final Styling and Architectural Integration
Changing the color of the wall represents only the first part of the equation. A successfully updated room requires you to integrate this new surface with the surrounding interior decor. A painted beadboard-style wall interacts with ambient lighting and furniture quite differently from a flat sheet of drywall. The physics of light reflection changes entirely when vertical grooves cast tiny shadows across the room. You must style the space to deliberately complement the newly established texture.
Balancing Textures in the Room
Vertical lines inherently draw the human eye upward. This creates an optical illusion of heightened ceilings, which is often highly desirable in a basement setting. You can soften this strong vertical geometry by introducing contrasting shapes into the space. Place a large round mirror or a circular piece of canvas artwork directly against the linear boards. The curved organic forms break up the rigid, mathematical grid of the paneling.
Furthermore, because painted paneling retains a subtle, hard texture, you should contrast it with highly tactile furnishings. Hanging heavy linen curtains, rolling out a plush wool rug, or placing a worn leather armchair in front of the wall helps balance the sensory experience of the room. The ultimate goal is to make the paneled wall feel like a deliberate background element rather than an overwhelming, inescapable focal point. Avoid placing heavily striped furniture against the wall, as the competing linear patterns frequently induce visual fatigue.
Treating Paneling as a Feature Wall
Sometimes, the best way to handle extensive wood treatments is to physically reduce their footprint within the home. If a room feels entirely encased in vertical lines, you might consider leaving the wood treatment on a single accent wall. You could then install fresh, smooth drywall over the remaining three boundaries. A singular wall of dark, painted paneling positioned directly behind a bed acts as a brilliant, textured anchor for the sleeping quarters. It provides architectural weight without dominating the atmosphere.
Alternatively, you could install a horizontal chair rail across the entire perimeter of the room. Leave the vertical boards strictly on the lower half of the wall to act as traditional wainscoting. Then, install smooth drywall or patterned wallpaper on the upper hemisphere. This classic architectural division literally halves the visual impact of the vertical lines. It retains the material’s inherent durability against scuffs and daily wear near the floor while dramatically lightening the upper sightlines of the space.

Conclusion
Dealing with outdated mid-century wall treatments does not necessitate messy demolition or exorbitant contractor fees. The physical material itself rarely constitutes the actual problem. The aesthetic issue usually lies in the heavy, light-absorbing finishes applied fifty years ago. By dedicating the time to properly clean, prepare, and seal the surface, you can completely alter its visual impact on your home.
Whether you opt for a sleek dark enamel, a soft coastal whitewash, or the raw beauty of stripped pine, the potential for architectural transformation remains immense. Knowing exactly how to make wood paneling look nice grants you the agency to reclaim your living space. It allows you to honor the structural history of your house while pushing the aesthetic firmly into the present day. Armed with the correct bonding primers and a clear design vision, you can turn your darkest, most avoided room into a striking architectural feature.
About
Mike May is a distinguished figure in the world of woodworking and timber design, with a decade of expertise creating innovative and sustainable indoor solutions. His professional focus lies in merging traditional craftsmanship with modern manufacturing techniques, fostering designs that are both practical and environmentally conscious. As the author of Woodimber, Mike delves into the art and science of timber-craft, inspiring artisans and industry professionals alike.
Education
RMIT University (Melbourne, Australia)
-
Associate Degree in Design (Timber): Focus on sustainable design, industry-driven projects, and practical craftsmanship.
-
Gained hands-on experience with traditional and digital manufacturing tools, such as CAD and CNC software.
Nottingham Trent University (United Kingdom)
-
Bachelor’s in Woodworking and Product Design (Honors): Specialized in product design with a focus on blending creativity with production techniques.
-
Participated in industry projects, working with companies like John Lewis and Vitsoe to gain real-world insights.
Publications and Impact
In Woodimber, May shares his insights on timber design processes, materials, and strategies for efficient production. His writing bridges the gap between artisan knowledge and modern industry needs, making it a must-read for both budding designers and seasoned professionals.