 (1)")

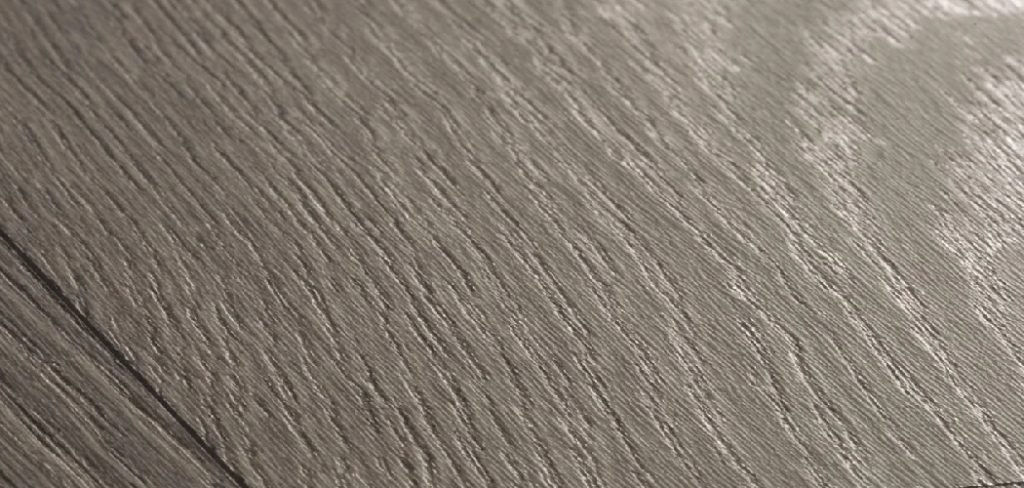
There is something undeniably timeless about the look of weathered, silver-grey wood. It evokes images of coastal driftwood, rustic barns, and cozy farmhouses, bringing a sense of history and calm to any space. While nature takes years or even decades to achieve this specific patina, you don’t have to wait that long to enjoy it in your own home.
Whether you are upcycling a thrift store find or building a new table from scratch, mastering how to turn wood grey allows you to instantly age your project with beautiful, authentic results. This process is surprisingly simple, requiring just a few household ingredients and a bit of patience. In this guide, we will walk you through the entire transformation process, ensuring you can achieve that coveted designer look on a DIY budget.
Transforming wood to achieve a grey, weathered look has become an increasingly popular trend in home design. This technique brings a rustic charm and timeless aesthetic to furniture, décor pieces, and more. The process not only enhances the visual appeal of the wood but also allows for personalized and unique results. Whether you are aiming for a subtle driftwood tone or a bolder, darker grey, this guide will help you achieve the perfect finish while keeping the process fun and accessible for all skill levels.
The Enduring Appeal of Grey Wood Finishes
The trend of grey wood has exploded in popularity over the last decade, becoming a staple in interior design styles ranging from modern farmhouse to Scandinavian minimalism. Unlike warm stains that can sometimes feel dated or heavy, grey finishes offer a neutral, sophisticated backdrop that complements almost any color palette. It bridges the gap between rustic and refined, adding texture and character without overwhelming a room.
This aesthetic choice also serves a practical purpose. Grey wood finishes are excellent at hiding dust and minor imperfections, making them ideal for high-traffic areas or family homes. The look mimics the natural oxidation process of timber exposed to the elements, grounding furniture pieces with an organic, earthy feel. By artificially creating this look, you gain control over the shade and intensity, allowing you to customize the finish to perfectly match your vision, whether that is a light, airy driftwood tone or a deep, stormy charcoal.
Step-by-Step Guide on How to Turn Wood Grey
Step 1: Gather Your Materials and Prepare the Workspace
Before beginning your project, you must assemble all the necessary supplies to ensure a smooth process. You will need fine steel wool (grade #0000 is best), white vinegar, a glass jar with a lid, black tea bags, a paintbrush, sandpaper, and clean rags. It is crucial to set up your workspace in a well-ventilated area, as the chemical reaction between the steel wool and vinegar can produce strong fumes.

Cover your work surface with a drop cloth or old newspapers to protect it from spills. Having everything organized and within reach prevents panic during the application phase. Ensure your wood piece is clean, dry, and free of any old paint or varnish, as this technique only works on raw timber.
Step 2: Create the Oxidizing Solution
The magic behind aging wood lies in a simple chemical reaction. To start, take a pad of steel wool and tear it into small pieces, placing them into your glass jar. Fill the jar with white vinegar until the steel wool is completely submerged. Screw the lid on loosely—do not tighten it fully, as the reaction releases gas that needs to escape. Let this mixture sit for at least 24 hours.
The acid in the vinegar dissolves the iron in the steel wool, creating an iron acetate solution. The longer you let it steep, the darker and more intense the final color will be. For a lighter grey, 24 hours is sufficient; for a darker, more dramatic look, leave it for three to four days.
Step 3: Sand the Wood to Open the Grain
For the solution to penetrate effectively, the wood surface must be porous and free of barriers. Use medium-grit sandpaper (around 120-grit) to sand the entire piece thoroughly. Sanding removes any factory coatings, mill glaze, or previous finishes that would prevent absorption. Always sand in the direction of the wood grain to avoid creating unsightly scratches.
After the initial sanding, switch to a finer grit (220-grit) to smooth out the surface. Wipe away all the sawdust with a tack cloth or a damp rag. This preparation step is vital because if the wood cannot absorb the tea and vinegar solutions evenly, the final color will be blotchy and inconsistent.
Step 4: Brew Strong Black Tea for Tannins
Different types of wood contain different levels of natural tannins. Hardwoods like oak have high tannin content, which reacts strongly with the iron acetate. Softwoods like pine, however, have very few tannins and won’t turn grey without a booster. To ensure a rich, consistent color, brew a pot of very strong black tea. Use about four or five tea bags for every two cups of boiling water and let it steep until it cools to room temperature.

The tea acts as a primer, adding tannins to the wood fibers. This step ensures that regardless of the wood species you are using, you will achieve a beautiful reaction when you apply the oxidizing solution later.
Step 5: Apply the Tea Wash to the Wood
Once your tea concentrate has cooled, use a paintbrush or a clean rag to apply it generously to the wood. Make sure to cover every inch of the surface, including edges and corners. The tea will darken the wood slightly, but don’t worry—this is not the final color. The primary goal here is to saturate the wood fibers with tannins.
Allow the tea wash to dry completely before moving on to the next step. If you apply the iron acetate solution while the wood is still wet with tea, the reaction might happen too quickly or unevenly. Ensuring the wood is dry gives you better control over the final outcome and helps you avoid streaks.
Step 6: Test the Iron Acetate Solution
Before committing to the entire piece, it is wise to test your vinegar and steel wool mixture on a scrap piece of the same wood or an inconspicuous area. This allows you to preview the color intensity. Apply the solution and wait a few minutes, as the color change is not always instant. It deepens as it dries. If the resulting grey is too dark, dilute your solution with a little water.
If it is too light, let your steel wool steep in the vinegar for another day. This testing phase is a critical part of learning how to turn wood grey effectively, preventing potential heartbreak on your main project.
Step 7: Apply the Oxidizing Solution
Now comes the most exciting part of the transformation. Dip your brush into the iron acetate solution and apply it to the wood in long, even strokes. As the solution reacts with the tannins from the tea, you will see the wood begin to change color almost immediately.

It may look brownish or purplish at first, but as it dries, it will settle into a gorgeous weathered grey. Work quickly to keep a wet edge and avoid lap marks. Ensure you coat the surface evenly, but avoid letting the liquid pool in crevices, as this can create overly dark spots. Watch the magic happen as your new wood ages decades in a matter of minutes.
Frequently Asked Questions
Can I Use Apple Cider Vinegar Instead?
Yes, you can substitute apple cider vinegar for white vinegar.
The chemical reaction relies on the acidity to dissolve the steel wool, and apple cider vinegar is sufficiently acidic. However, be aware that apple cider vinegar has a darker, amber color compared to clear white vinegar. This can sometimes impart a slightly warmer or browner undertone to the final grey finish. If you want a strictly cool, silvery grey, white vinegar is the safer choice. Always test on a scrap piece first to see if the color variance matches your vision.
Does This Method Work on All Wood Types?
This method works on almost all solid woods, but the results vary significantly by species.
Oak and walnut, which are high in tannins, will turn a very dark grey or even black very quickly. Pine, spruce, and fir are low in tannins and will require the black tea pre-treatment to achieve a noticeable grey color. This technique does not work well on pressure-treated lumber (which has chemical barriers) or faux wood composites. It is strictly for raw, untreated natural timber that can absorb the solutions.

How Long Will the Grey Finish Last?
The iron acetate finish is permanent because it is a chemical change within the wood fibers, not just a surface paint.
It will not peel or flake off like paint does. However, like any wood surface, it can fade slightly if exposed to direct sunlight for years. The longevity of the look largely depends on the topcoat sealer you apply. A high-quality matte polyurethane will lock in the color and protect it from UV rays and moisture, ensuring the grey patina remains vibrant for many years.
What If the Color Is Too Dark?
If your wood turns darker than you intended, don’t panic.
You can lighten the finish by sanding the surface gently with fine-grit sandpaper (220-grit). Since the chemical reaction penetrates the wood fibers, sanding removes the darkest top layer, revealing lighter tones underneath. Alternatively, you can try wiping the wood with a damp cloth to remove some surface residue. To prevent this in the future, dilute your iron acetate solution with water before applying it, or steep the steel wool for a shorter period.
Is the Smell of Vinegar Permanent?
No, the strong vinegar smell is temporary.
During the application and drying process, the smell will be quite potent, which is why ventilation is important. However, once the solution has fully evaporated and the wood is completely dry, the odor will dissipate entirely. Applying a final clear coat or wax further seals the surface and eliminates any lingering scent. You will be left with a beautiful piece of furniture that smells like wood and finish, not a salad dressing.
Conclusion
Transforming raw lumber into a piece that looks like it has weathered storms for a century is a rewarding and magical DIY experience. It allows you to add character, depth, and a sense of history to your home without the high price tag of authentic reclaimed barn wood. By understanding the simple chemistry between iron, vinegar, and tannins, you unlock a powerful design tool that puts you in complete control of your furniture’s aesthetic.
Remember that patience is key—letting your solution brew and testing your colors will guarantee the best results. Don’t be afraid to experiment with different wood types and tea strengths to find your signature shade. Now that you have mastered the art of how to turn wood grey, you are ready to tackle your next project with confidence, creating stunning, rustic pieces that will be conversation starters for years to come.
About
Mike May is a distinguished figure in the world of woodworking and timber design, with a decade of expertise creating innovative and sustainable indoor solutions. His professional focus lies in merging traditional craftsmanship with modern manufacturing techniques, fostering designs that are both practical and environmentally conscious. As the author of Woodimber, Mike delves into the art and science of timber-craft, inspiring artisans and industry professionals alike.
Education
RMIT University (Melbourne, Australia)
-
Associate Degree in Design (Timber): Focus on sustainable design, industry-driven projects, and practical craftsmanship.
-
Gained hands-on experience with traditional and digital manufacturing tools, such as CAD and CNC software.
Nottingham Trent University (United Kingdom)
-
Bachelor’s in Woodworking and Product Design (Honors): Specialized in product design with a focus on blending creativity with production techniques.
-
Participated in industry projects, working with companies like John Lewis and Vitsoe to gain real-world insights.
Publications and Impact
In Woodimber, May shares his insights on timber design processes, materials, and strategies for efficient production. His writing bridges the gap between artisan knowledge and modern industry needs, making it a must-read for both budding designers and seasoned professionals.