 (1)")

Hardwood floors have a quiet elegance—durable, timeless, and, when well cared for, endlessly appealing. Yet even the most resilient floors can begin to show their age.

Foot traffic leaves its mark, sunlight can fade a once-rich hue, and a style that once felt fresh may now appear dated. Restaining your hardwood isn’t just about aesthetics; it’s a way to breathe new life into your home without the expense—or hassle—of replacing the flooring entirely. The good news? With the right preparation, materials, and a little patience, this is a project you can undertake yourself.
This guide on how to restain hardwood floors aims to walk you through the process in detail—from understanding what kind of wood you’re working with to applying a finish that will last. By the end, you should feel confident tackling your floors and achieving results that, while DIY, can rival a professional job. Let’s explore a process that can subtly, yet profoundly, alter the feel of your space.
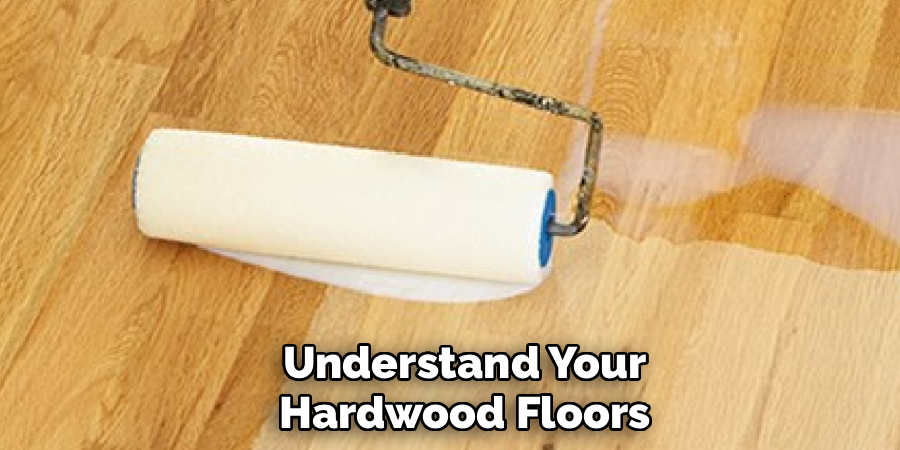
Understand Your Hardwood Floors
Before you even pick up a sander, take a moment—or several—to study your floors. Hardwood isn’t a monolith; the species, construction, and finish all shape your approach. Solid hardwood consists of single planks and can endure multiple sanding cycles over decades. Engineered hardwood, by contrast, has a thin veneer atop plywood or composite, limiting how often you can safely refinish it.
A careful inspection is indispensable. Deep scratches, water stains, or warped boards may require repair before you touch a drop of stain. Note the existing finish: some floors have oil-based polyurethane, others water-based coatings, and some may even be waxed. Understanding these nuances will not only guide your product choice but also shape realistic expectations for the end result.
Tools and Materials You’ll Need
- Drum or orbital sander and sandpaper (medium and fine grits)
- Floor cleaner or degreaser
- Stain of your choice
- Protective finish (polyurethane, wax, etc.)
- Brushes or rollers for application
- Protective gear: gloves, goggles, and a respirator or mask
- Painter’s tape
- Rags or cloths for cleaning
7 Step-by-step Guides on How to Restain Hardwood Floors
Step 1: Prepare the Room and Clear the Space
Begin by removing all furniture, rugs, curtains, and decorative items. Even small objects can impede your work—or worse, become irreparably damaged. Detach floor vents and cover outlets to keep dust from infiltrating your HVAC system or creating fire hazards.
Seal doorways with plastic sheeting and tape. Sanding produces an astonishing amount of fine dust, which migrates further than you might expect. A proactive approach here saves hours of cleanup—and protects the rest of your home. Lastly, check for protruding nails or staples; hammer them down or remove them entirely. This attention to detail may seem tedious, but it pays dividends in both safety and the quality of your final finish.
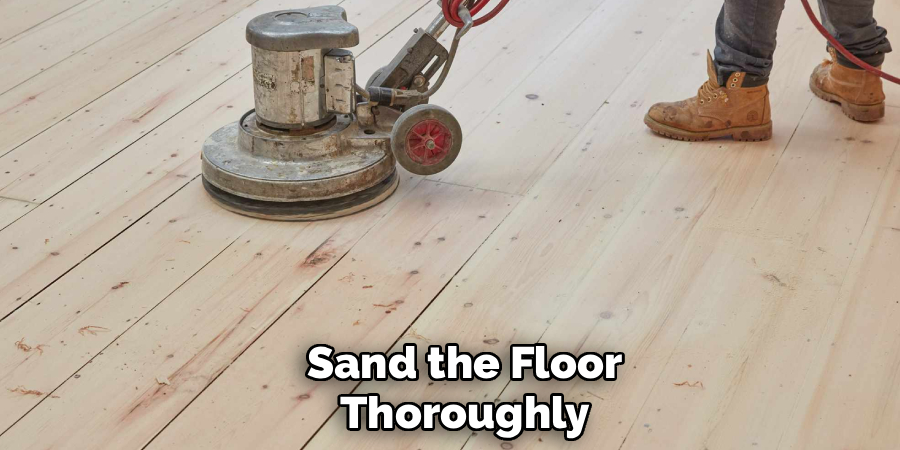
Step 2: Sand the Floor Thoroughly
Sanding is often the make-or-break stage. It removes the old finish, smooths uneven spots, and allows the new stain to adhere properly. Start with coarse-grit sandpaper—36 or 40 grit—using a drum sander. Move steadily along the grain, overlapping your passes; lingering in one spot risks gouging the wood.
After the initial pass, vacuum carefully before moving to medium (60 grit), fine (80 grit), and finally extra-fine (120 grit) sandpaper. Each stage erases the scratches left by the previous grit, gradually leaving a velvety smooth surface. Corners and edges require an edge sander or hand sanding. Though physically demanding and time-consuming, proper sanding underpins the quality of every subsequent step. Skimping here almost always shows in blotchy stains or uneven finishes.
Step 3: Clean Up All Dust Completely
Once sanding is complete, your room will be coated in a fine haze of wood dust. Multiple passes with a vacuum—preferably a shop vac with a brush attachment—are essential. Follow up with tack cloths to remove particles that the vacuum cannot reach. Work systematically in small sections, refreshing cloths as needed.
Some professionals lightly wipe the floor with a mineral spirits-dampened cloth for a final clean, though drying time must be strictly observed. Dust left behind is not a trivial concern; it can interfere with stain absorption and create a speckled, uneven appearance that undermines all your careful sanding.
Step 4: Apply Wood Conditioner (If Needed)
Certain woods—softer species like pine, or those with varied grain patterns like cherry and maple—absorb stain unevenly, often leaving blotchy patches. A pre-stain conditioner can mitigate this risk.
Use a brush or cloth to work the conditioner along the grain, then allow it to penetrate according to the manufacturer’s instructions. Wipe away any excess. The surface should feel slightly damp but never wet. Not all woods require conditioning; oak, for instance, is usually forgiving. When in doubt, test a small, hidden area first.
Step 5: Apply the Stain Evenly
Now comes the transformative moment. Apply stain in small, manageable sections—two or three boards at a time—to maintain control. Brush or pad the stain along the grain in smooth, continuous strokes. Timing matters: leave the stain for 5–15 minutes (depending on the product) and then wipe off the excess with a clean, lint-free cloth. Longer dwell times deepen the color; consistent pressure ensures uniform absorption.
If a richer tone is desired, a second coat can be applied once the first is fully dry, usually after 24 hours. Keep the room ventilated. Stain fumes are not merely unpleasant—they can be hazardous if inhaled over long periods.
Step 6: Allow Proper Drying Time
Patience is essential. Even if the floor feels dry to the touch, the stain continues to cure beneath the surface. Most stains require 24–48 hours, though temperature, humidity, and ventilation influence the timeline. Avoid walking on the floor or exposing it to direct sunlight, which can cause uneven curing. Rushing this step is a common pitfall, often resulting in a tacky finish or a topcoat that fails to adhere properly.
Step 7: Apply Protective Finish Coats
Finally, seal your work with a protective finish. Polyurethane is the standard, available in oil- or water-based formulas. Oil-based versions impart a warm amber glow and exceptional durability, while water-based finishes dry faster, produce fewer fumes, and remain clear over time.
Apply thin, even coats along the grain, taking care to avoid pooling or bubbles. Dry according to the manufacturer’s instructions, sand lightly with 220-grit paper between coats, and repeat. Most floors benefit from at least three coats in high-traffic areas. After the final layer, wait 24–48 hours before walking on the floor with socks, and at least a week before replacing furniture.
Following these steps on how to restain hardwood floors will not only revitalize the look of your floors but also protect and extend their lifespan. With proper care and maintenance, hardwood floors can last for decades and continue to add beauty and value to your home.

Maintaining Your Newly Restained Floors
Even the best work can degrade without proper care. Use non-abrasive cleaners designed for hardwood; avoid harsh chemicals or abrasive tools that can scratch or dull the finish. Initially, stick to dry microfiber mops or soft vacuum attachments. When introducing water, do so sparingly, using products formulated for wood floors.
Consider furniture pads, rugs in busy areas, and routine trimming of pets’ nails. Encourage family members to remove shoes at the door. These small precautions will extend the life and appearance of your floors, keeping them looking fresh for years.
Common Mistakes to Avoid
Errors happen, even to careful DIYers. Inadequate sanding leaves residual finish, producing uneven absorption. Failing to remove dust can create a gritty texture. Applying stain too thickly or neglecting to wipe off excess often results in a sticky surface.
Skipping conditioner on susceptible woods leads to blotchiness. And rushing the drying process can prevent proper adhesion, leaving a soft or uneven topcoat. Awareness of these pitfalls is half the battle.
Frequently Asked Questions
Q: Can I Restain Hardwood Floors Without Sanding?
A: Products claiming “sandless refinishing” mostly add a new layer atop the existing finish. They won’t genuinely change the wood’s color or address scratches. For authentic color change and long-lasting results, sanding remains essential.
Q: How Long Does It Take to Restain Hardwood Floors?
A typical project spans 4–7 days. Sanding can take 1–2 days, staining a few hours (with 24–48 hours drying), and polyurethane coats add another 2–3 days. Plan for at least a week before replacing furniture to avoid damaging your freshly finished floors.

Conclusion
Restaining hardwood floors is a demanding but achievable DIY endeavor. Proper preparation, careful sanding, controlled stain application, and protective finishing yield floors that can rival professional results. It requires time, focus, and effort—but the payoff is tangible: renewed surfaces that elevate both the appearance and value of your home.
So, if your floors are showing their age, gather your materials, clear your schedule, and begin. With patience and attention, your hardwood can regain its former vibrancy, transforming the character of your living space in subtle but unmistakable ways. Thanks for reading this guide on how to restain hardwood floors.
About
Mike May is a distinguished figure in the world of woodworking and timber design, with a decade of expertise creating innovative and sustainable indoor solutions. His professional focus lies in merging traditional craftsmanship with modern manufacturing techniques, fostering designs that are both practical and environmentally conscious. As the author of Woodimber, Mike delves into the art and science of timber-craft, inspiring artisans and industry professionals alike.
Education
RMIT University (Melbourne, Australia)
-
Associate Degree in Design (Timber): Focus on sustainable design, industry-driven projects, and practical craftsmanship.
-
Gained hands-on experience with traditional and digital manufacturing tools, such as CAD and CNC software.
Nottingham Trent University (United Kingdom)
-
Bachelor’s in Woodworking and Product Design (Honors): Specialized in product design with a focus on blending creativity with production techniques.
-
Participated in industry projects, working with companies like John Lewis and Vitsoe to gain real-world insights.
Publications and Impact
In Woodimber, May shares his insights on timber design processes, materials, and strategies for efficient production. His writing bridges the gap between artisan knowledge and modern industry needs, making it a must-read for both budding designers and seasoned professionals.