 (1)")

Maintaining carpeted stairs often feels like an exercise in futility. Fibers inevitably trap dust, allergens, and the daily detritus of foot traffic. Vacuuming these angled surfaces presents a frustrating physical challenge. Over time, the aesthetic decline becomes impossible to ignore. Worn carpet dragging over the nose of a tread suggests structural neglect, even when the underlying framing remains sound.
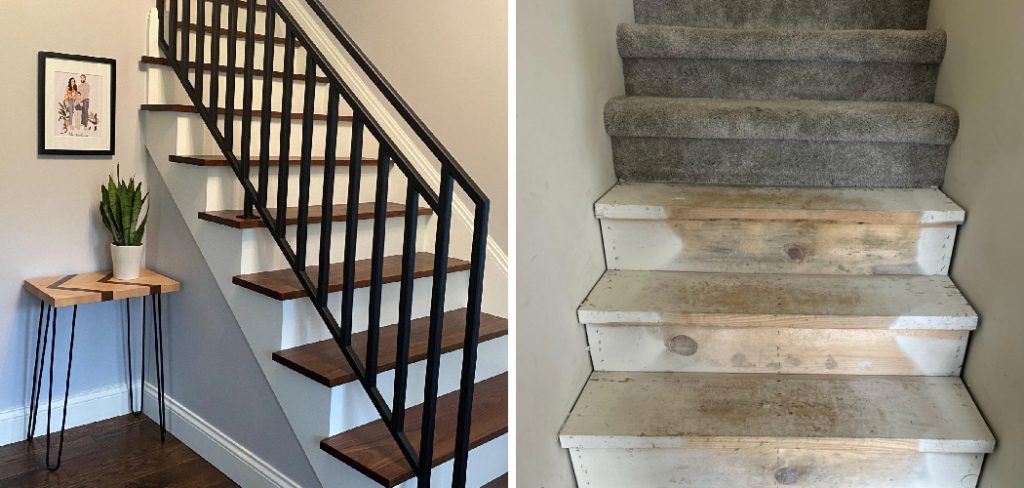
Transforming this dated feature into a solid hardwood focal point might initially seem like a task reserved exclusively for professional carpenters. However, executing this upgrade independently could potentially yield significant financial savings. This comprehensive guide outlines how to replace carpet stairs with wood stairs, providing the analytical framework and physical steps required to achieve a professional-grade transition.
Why You Should Know How to Replace Carpet Stairs with Wood Stairs?
Investing the physical labor into a staircase renovation often yields returns that extend far beyond mere visual appeal. Understanding how to replace carpet stairs with wood stairs empowers homeowners to fundamentally alter the architectural atmosphere of their property. It removes a notoriously difficult-to-clean material and replaces it with a surface known for historical longevity.
Boosting Home Value and Aesthetics
Real estate markets tend to favor hard surfaces in high-traffic transition areas. Hardwood staircases frequently suggest a premium build quality to prospective buyers. They establish a visual continuity between floors that might otherwise feel disconnected.
A beautifully stained oak tread creates sharp geometric lines. This structural clarity often modernizes a space much more effectively than a fresh coat of paint ever could. Property equity may experience a measurable increase following such a permanent architectural modification.
Improving Indoor Air Quality and Cleaning
The environmental implications of removing old carpet are occasionally understated. Woven fibers act as a highly efficient reservoir for pet dander and microscopic particulate matter. Every footstep forces these trapped elements back into the ambient air circulation.
Transitioning to a solid surface could dramatically reduce localized allergen concentrations. Furthermore, maintaining bare wood requires only a microfiber mop. This simple maintenance routine eliminates the need to balance heavy vacuum cleaners precariously on narrow ledges.
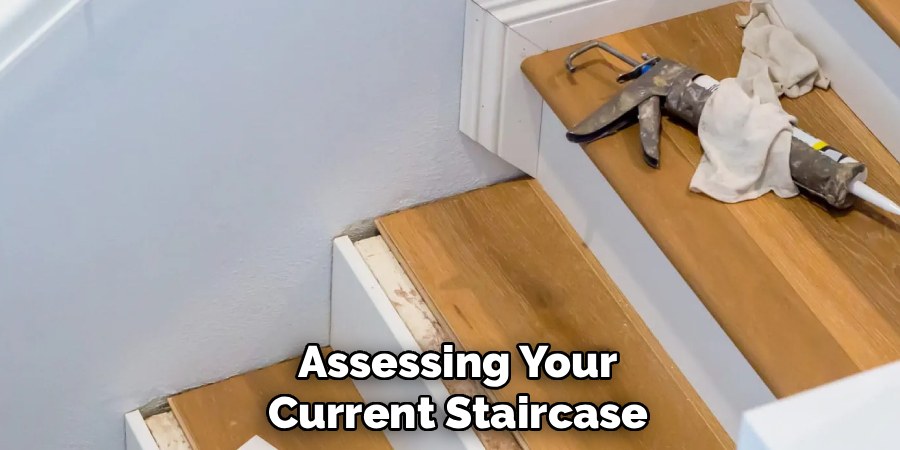
Assessing Your Current Staircase
Before initiating any destructive processes, a thorough evaluation of the existing framework is necessary. Builders frequently construct carpet-grade stairs using rough pine framing or low-grade plywood. These utilitarian materials are never intended for public display. They cannot simply be sanded and stained.

Checking for Structural Integrity and Squeaks
Begin by walking the staircase with deliberate, heavy steps. Listen critically. Squeaks typically indicate loose mechanical connections between the rough tread and the underlying stringer. Now is the ideal moment to rectify these acoustic annoyances. Driving heavy construction screws through the sub-tread directly into the stringer frame will often stabilize the movement. A silent foundation appears to be a prerequisite for a successful hardwood overlay.
Measuring Tread Depth and Riser Height
Building codes strictly regulate stair dimensions to prevent tripping hazards. Adding a thick layer of hardwood over an existing sub-tread will inherently alter the rise of the first and last step. You must measure the current riser height carefully. Using retrofit replacement treads, which are generally thinner than traditional structural lumber, often mitigates this issue. Consistent mathematical calculation before purchasing materials prevents severe structural misalignments later.
Choosing the Right Wood and Materials
The marketplace offers a bewildering array of timber options for staircase renovations. Balancing budgetary constraints with anticipated wear patterns requires careful consideration. The materials you select will dictate the longevity of the installation.
Hardwood Treads vs. Pine
While pine is remarkably affordable, it is a soft botanical species. Dropped objects and pet claws will dent it almost immediately. Dense hardwoods like red oak or hard maple might present a higher initial cost, but their cellular density resists impact damage exceptionally well. Oak, in particular, accepts oil-based stains uniformly. This predictability makes it a preferred choice for residential applications.
The Benefits of Retrofit Stair Treads
Traditional stair treads are thick, heavy planks designed to act as the sole structural support between stringers. Retrofit stair treads offer a compelling alternative. These engineered caps are molded with an integrated bullnose edge. They are designed specifically to slide directly over an existing plywood sub-tread. Utilizing a retrofit system frequently reduces the complexity of the installation process.
Selecting Materials for the Risers
The vertical boards situated between each step are known as risers. Because they do not endure direct downward foot traffic, they do not necessarily require the same dense cellular structure as the treads. Many designers choose to install budget-friendly primed plywood here. Painting these vertical surfaces a crisp white creates a classic two-tone aesthetic that beautifully highlights the natural grain of the horizontal wood.
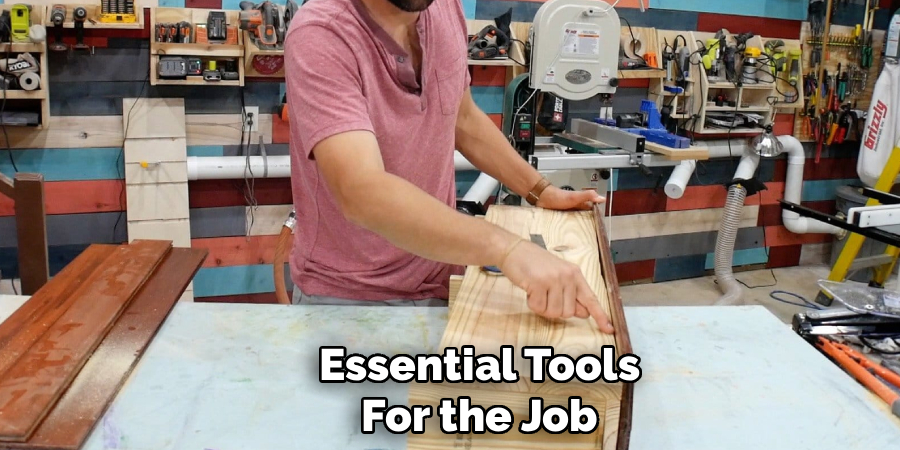
Essential Tools for the Job
A smooth workflow depends entirely on assembling the proper mechanical implements before beginning the work. Interrupting a time-sensitive gluing process to search for a missing pry bar introduces unnecessary stress. Categorizing your tool requirements helps maintain organizational clarity.
Demolition Tools
Extracting decades-old carpeting is an aggressively physical undertaking. You will require a heavy-duty utility knife equipped with a fresh blade to slice the fabric into manageable strips. A flat pry bar and a claw hammer are mandatory for dismantling the tack strips. Most importantly, procure a dedicated pair of heavy-duty pliers. You will use these to manually extract the hundreds of industrial staples left behind by the original carpet installers.
Installation and Measuring Tools
The installation phase demands precision rather than brute force. A sliding compound miter saw is necessary for executing clean crosscuts. You will also need a reliable brad nailer driven by an air compressor. High-adhesion polyurethane construction adhesive is perhaps the most vital component, as it prevents future squeaking. Finally, a specialized stair tread template tool, often referred to as a stair jig, is practically indispensable for capturing irregular wall angles.
Preparing the Work Area and Safety Measures
Converting rough lumber into finished architectural features generates an astonishing volume of fine particulate dust. Woodworking equipment operates at high decibel levels and produces flying debris. Establishing a designated workspace protects both the operator and the surrounding domestic environment.
Setting Up a Cutting Station
Operating a miter saw inside a finished hallway virtually guarantees that sawdust will infiltrate the HVAC system. You should set up your primary cutting station outdoors or within a well-ventilated garage. Keep a portable shop vacuum adjacent to the saw to capture debris immediately at the source. This containment strategy significantly reduces the post-project cleanup burden.
Necessary Safety Gear
Personal protection is paramount. Protective eyewear defends against erratic wood splinters. Because removing carpet staples demands prolonged contact with the floor, a thick pair of professional knee pads might save you from acute joint pain. A particulate respirator should be worn whenever the saws are actively engaged.
How to Replace Carpet Stairs with Wood Stairs: Step-by-Step Guide
This section outlines the physical sequence of transformation. Approaching the staircase methodically, usually from the top landing downward, prevents you from trapping yourself on an unfinished level. Patience during these specific actions generally yields a vastly superior outcome.
Step 1: Removing the Old Carpet and Padding
Begin at the highest elevation of the staircase. Using your utility knife, slice the carpet vertically down the center. Grab a corner and pull the fabric firmly away from the tack strips located at the rear of the tread. Roll the soiled material into tightly bound cylinders for disposal. The underlying foam padding usually detaches with minimal resistance, though it may disintegrate slightly if it is particularly old.
Step 2: Pulling Staples and Tack Strips
This phase is notoriously tedious. Builders secure carpet padding with an excessive number of staples. Every single piece of metal must be removed. If a staple remains protruding from the sub-tread, the new hardwood cap will not sit perfectly flush. Use your pliers to twist and pull the staples free. Subsequently, wedge your flat pry bar beneath the wooden tack strips and lever them upward, being careful to collect the rusty nails that inevitably fall out.
Step 3: Removing the Existing Nosing (If Necessary)
Many rough framing treads feature a rounded lip that overhangs the riser beneath it. If you are utilizing a retrofit tread system, this overhang usually prevents the new cap from sliding backward into its proper position. You might need to deploy a circular saw or a jigsaw to cleanly sever this protruding bullnose. The resulting surface should be a completely flat, ninety-degree angle between the tread and the riser.
Step 4: Measuring and Cutting the Risers
Always install the vertical risers before the horizontal treads. This overlapping sequence allows the back edge of the new tread to completely conceal the bottom joint of the riser. Measure the distance between the two side walls (stringers). Because houses settle over time, these walls are rarely perfectly parallel. Transfer this measurement to your primed plywood or hardwood riser material and execute the cut on your miter saw.
Step 5: Installing the New Risers
Test-fit the freshly cut board against the rough framing. If the alignment is acceptable, apply generous serpentine beads of construction adhesive to the back of the riser. Press the board firmly into the vertical framing. Secure the wood immediately by driving multiple brad nails through the face and directly into the structural supports behind it. The adhesive provides the permanent bond, while the nails simply act as temporary clamps while the glue cures.
Step 6: Measuring and Cutting the Treads Using a Jig
This operation requires a specialized approach. Staircase walls are rarely perfectly square. Measuring with a standard tape measure often results in unsightly gaps along the edges. Place your stair tread template tool onto the rough step. Expand the arms of the jig until they sit perfectly flush against both the left and right walls. Lock the jig’s mechanisms securely. Carefully transfer this precise geometric template onto your new hardwood tread. Trace the angles with a pencil and cut precisely along those lines.
Step 7: Gluing and Nailing the Wood Treads
Dry fit the cut tread to verify the edge tolerances. Remove the board and dispense a heavy application of construction adhesive directly onto the rough plywood sub-tread. Do not skimp on the adhesive; insufficient glue often leads to hollow acoustic echoes. Slide the hardwood tread firmly into place, ensuring the front bullnose wraps cleanly over the freshly installed riser beneath it. Fire a series of brad nails exclusively along the back edge of the tread, where the subsequent riser will permanently hide the small nail holes.
Staining and Finishing Your New Wood Stairs
Raw timber requires chemical protection from ambient moisture and mechanical friction. The finishing process establishes the final aesthetic character of the installation. Coordinating this application phase requires strategic planning regarding household foot traffic.
Pre-finishing vs. Finishing in Place
Applying liquid polyurethane inside a functioning residence presents severe logistical hurdles. The staircase becomes impassable for several days. It might be significantly more efficient to sand, stain, and seal the individual treads in your garage before installation. Pre-finishing allows you to control the drying environment away from pet hair and dust. Once the polyurethane has completely hardened, you can install the finished boards using adhesive and discreet nailing, minimizing disruption to the household.
Applying Polyurethane for Durability
Stairs endure more concentrated friction than almost any other surface in a dwelling. A single coat of sealant is entirely inadequate. You must apply at least three individual coats of a high-quality, floor-grade polyurethane. Lightly abrade the surface with a fine sanding screen between each application. This microscopic scratching promotes mechanical adhesion between the chemical layers, resulting in a hardened shell capable of resisting decades of scuffs.
Long-Term Maintenance for Wood Stairs
Preserving the crystalline finish of your newly installed staircase requires a proactive domestic routine. Hardwood is remarkably resilient, yet it remains vulnerable to specific environmental abrasives. Passive management strategies often dictate the lifespan of the polyurethane topcoat.

Routine Cleaning Tips
Liquid water is the primary adversary of wooden architecture. Never saturate the staircase with heavy string mops or chemical buckets. Sweeping the treads frequently with a soft-bristled brush removes the microscopic silica particles that act like sandpaper under heavy shoes. When deeper sanitation is required, lightly mist a microfiber cloth with a pH-neutral hardwood-specific cleaner. Wipe the surface quickly and allow it to air dry immediately.
Preventing Slips and Scratches
A perfectly polished wooden step possesses a relatively low coefficient of friction. It can be quite slippery for individuals wearing simple socks. Implementing a strict ‘barefoot or indoor shoes’ policy might improve traction while simultaneously preventing outdoor grit from scratching the surface.
If slipping remains a profound concern, you could potentially apply discrete strips of clear anti-slip tape near the nosing or install a decorative carpet runner down the center to provide a safe walking path while leaving the beautiful wood edges exposed.
Conclusion
Dismantling a dated interior structure and replacing it with organic timber is a demanding but highly satisfying architectural endeavor. The transition fundamentally elevates the perceived quality of the residence. You eliminate the trapped allergens of synthetic fabrics and introduce a permanent, easily maintained surface that reflects light beautifully.
Executing this specific carpentry project demands strict measuring, a respect for safety protocols, and absolute patience during the adhesive phases. By following this analytical framework on how to replace carpet stairs with wood stairs, you possess the operational knowledge to discard those frayed fibers permanently. The resulting staircase will stand as a solid, enduring element within your home for generations.
About
Mike May is a distinguished figure in the world of woodworking and timber design, with a decade of expertise creating innovative and sustainable indoor solutions. His professional focus lies in merging traditional craftsmanship with modern manufacturing techniques, fostering designs that are both practical and environmentally conscious. As the author of Woodimber, Mike delves into the art and science of timber-craft, inspiring artisans and industry professionals alike.
Education
RMIT University (Melbourne, Australia)
-
Associate Degree in Design (Timber): Focus on sustainable design, industry-driven projects, and practical craftsmanship.
-
Gained hands-on experience with traditional and digital manufacturing tools, such as CAD and CNC software.
Nottingham Trent University (United Kingdom)
-
Bachelor’s in Woodworking and Product Design (Honors): Specialized in product design with a focus on blending creativity with production techniques.
-
Participated in industry projects, working with companies like John Lewis and Vitsoe to gain real-world insights.
Publications and Impact
In Woodimber, May shares his insights on timber design processes, materials, and strategies for efficient production. His writing bridges the gap between artisan knowledge and modern industry needs, making it a must-read for both budding designers and seasoned professionals.