 (1)")

The dark, grooved wood paneling of the 1970s often evokes a very specific, and perhaps not entirely positive, nostalgic response.
It can feel heavy, absorb natural light, and make a room feel smaller and more dated than it actually is. While ripping it all out is certainly an option, it’s a messy, labor-intensive, and often expensive undertaking. A far more accessible solution exists, one that requires strategic preparation rather than brute force demolition.
Painting this paneling can radically transform a space, lifting it from a dim, wood-clad cave into a bright, modern room. This isn’t as simple as slapping a coat of latex on the wall; the slick, often artificial surface of old paneling is notoriously resistant to new paint. The process demands a disciplined approach, one built on meticulous cleaning, careful surface abrasion, and the application of a high-adhesion primer. This guide will provide a detailed roadmap on how to paint over wood paneling, ensuring the final finish is durable, beautiful, and a lasting testament to proper preparation.
Why Does Paneling Require Such Specific Preparation?
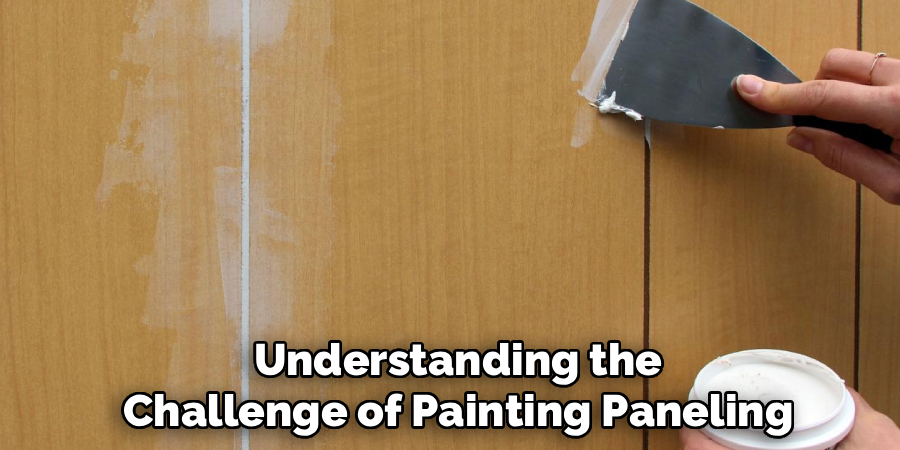
Understanding the Challenge of Painting Paneling
Before starting the process, it’s essential to grasp why wood paneling demands such specific preparation. Unlike regular drywall, most paneling isn’t made of solid, untreated wood. Instead, it typically features a thin wood veneer or even a photographic image of wood grain printed on a composite board. This is then sealed with a glossy, non-porous topcoat, such as varnish or lacquer, which was originally designed to resist stains and moisture. While this finish was perfect for its intended use, it creates a major obstacle when it comes to painting.
Why Preparation Matters
Attempting to paint on this slick surface without proper preparation will lead to peeling, chipping, or a finish so fragile that it can be scratched off easily. The preparation process is vital because it chemically and mechanically alters the surface to ensure a stable foundation that allows the new paint to firmly adhere. From cleaning away residues to roughening the surface and applying primer, each step plays a critical role in achieving a finish that is resilient and long-lasting. Without these steps, the painted paneling will be prone to damage, undoing all your effort.
Assessing Your Paneling and Making Repairs
Evaluating the Condition of Your Paneling
Before starting any painting project, it’s crucial to assess the condition of your wood paneling carefully. Not all paneling is the same—some may have natural wood veneers with a grain you can feel, while others might be smooth, printed boards with a synthetic texture. Run your hands across the surface to identify its type and check for damage. Look for areas where the paneling has separated from the wall, forming bubbles or loose sections, and secure these spots with construction adhesive and finishing nails.
Preparing for Repairs
Once you’ve identified the problem areas, it’s time to address them. Pay special attention to the grooves in the paneling. Some homeowners opt to fill these grooves with wood filler or spackle to create the appearance of a flat wall, but keep in mind this process can be labor-intensive and requires thorough sanding for a smooth finish.
Alternatively, many choose to paint the grooves along with the flat surfaces for a faster and more straightforward approach. For dings, deep scratches, or small holes, use a high-quality wood filler and sand the area smooth after it dries to ensure a seamless base for painting. Proper preparation at this stage will set the foundation for a flawless and durable finish.
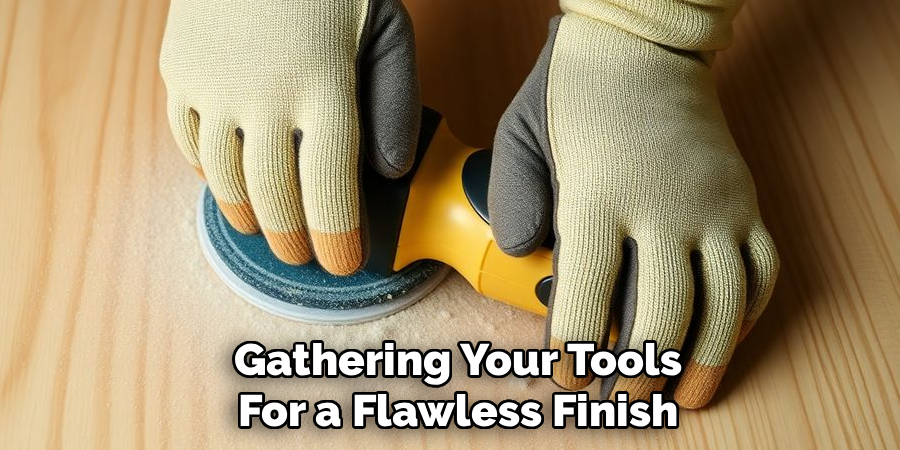
Gathering Your Tools for a Flawless Finish
A professional-quality paint job is often the direct result of using professional-quality tools and materials. Skimping on preparation supplies will almost always manifest as a failure in the final finish. For this project, the most important purchase you will make is not the paint itself, but the primer.
The Critical Role of Bonding Primer
You cannot use standard drywall primer for this task. You need a high-adhesion “bonding” primer. These specialized primers are formulated with unique polymers that allow them to stick tenaciously to slick, glossy, or otherwise hard-to-paint surfaces. Shellac-based primers are a classic choice; they offer incredible adhesion and are excellent at blocking stains, such as old watermarks or knots in real wood that might bleed tannins through the paint.
However, they are oil-based, have a strong odor, and require mineral spirits for cleanup. Modern water-based bonding primers have improved dramatically and can offer comparable adhesion with low odor and easy soap-and-water cleanup. Whichever you choose, this is the one material on which you should not compromise.
Essential Supplies for Preparation and Painting
Beyond the primer, you will need a strong degreasing cleaner. Trisodium phosphate (TSP) is the traditional choice for painters, though many effective and less caustic TSP substitutes are now available. For the sanding step, 120-grit or 180-grit sandpaper or sanding sponges will be sufficient. You’ll need plenty of clean rags for wiping down surfaces, painter’s tape for protecting trim, and drop cloths for the floor.
For the application itself, a high-quality angled brush is needed for cutting in around edges and painting the grooves, while a roller with a 3/8-inch nap cover is ideal for the flat sections. Finally, choose a durable topcoat paint. A high-quality acrylic-latex paint in an eggshell or satin sheen is a popular choice, as these finishes offer good washability without highlighting imperfections as much as a high-gloss paint would.
How to Paint Over Wood Paneling: Step-by-Step Guide
With your materials assembled and repairs complete, the methodical process of transformation can begin. Each of the following steps is a critical link in a chain; skipping or rushing any one of them can compromise the integrity of the entire project. Patience and attention to detail are your greatest assets.
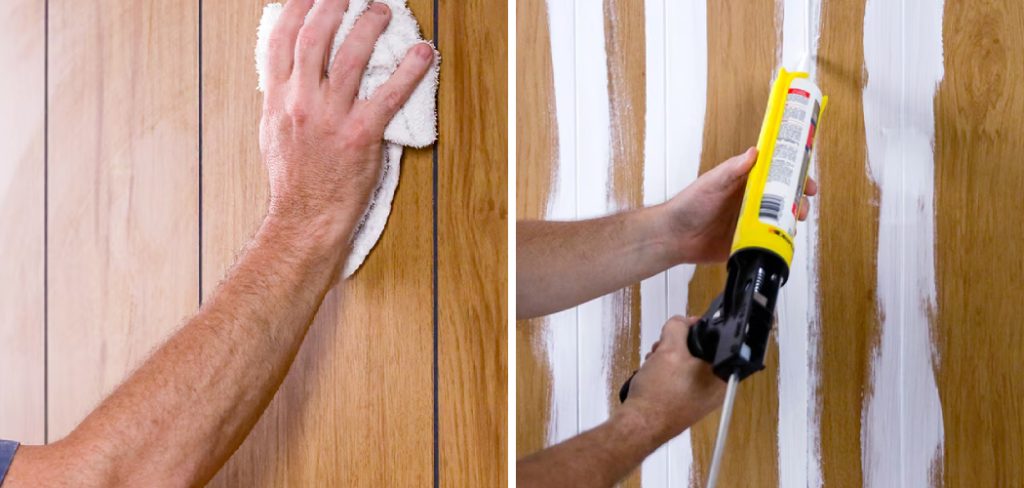
Step 1: The Deep Clean
The first physical step is to thoroughly clean the paneling. Over the years, walls accumulate a surprising amount of grime, from cooking grease and airborne dust to the residue from cleaning sprays and oils from hands. This invisible film will prevent the primer from adhering properly. Mix your TSP or TSP-substitute cleaner according to the manufacturer’s directions.
Wearing gloves, use a sponge or rag to scrub down the entire wall surface, paying special attention to areas around light switches or doorways. Don’t forget to get into the grooves. After scrubbing, you must rinse the wall with a separate sponge and clean water to remove any chemical residue from the cleaner itself. Allow the walls to dry completely.
Step 2: The Scuff Sand
Sanding is a step that many DIYers are tempted to skip, but its importance cannot be overstated. The goal here is not to sand down to bare wood. Rather, you are performing a “scuff sand.” You are simply trying to lightly abrade the glossy topcoat, creating millions of microscopic scratches that will give the primer a texture to grip onto.
Using your 120- or 180-grit sandpaper, lightly sand the entire surface of the paneling. You’re just looking to “degloss” the finish, knocking down the shine. Make sure to sand inside the grooves as well. Once you are finished, the paneling should have a dull, matte appearance. This step creates a tremendous amount of fine dust, so wearing a mask is highly recommended.
Step 3: Dust Removal
Just as you needed to clean the grime off the walls, you now need to remove every particle of dust you just created. If left on the surface, this dust will mix with your primer and create a gritty, unpleasant texture. Use the brush attachment on your vacuum to go over the entire wall, including the grooves. After vacuuming, follow up with a tack cloth or a slightly damp rag to pick up any remaining fine dust. Your hand should come away perfectly clean when you wipe it across the paneling.
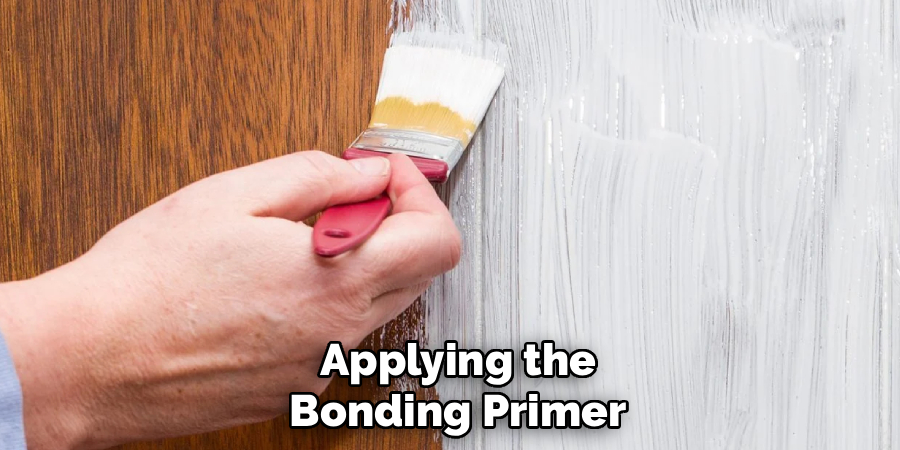
Step 4: Applying the Bonding Primer
Now, with a perfectly clean, dry, and dull surface, you are ready for the most critical step: priming. Begin by “cutting in” with your angled brush. This means painting a strip of primer along the ceiling, baseboards, corners, and any other trim. Next, use the brush to paint the primer into all the vertical grooves in the paneling. This is tedious work, but it ensures complete coverage.
Once all the detail work is done, you can use your roller to apply a thin, even coat of primer to the flat surfaces of the paneling. Work in a systematic “W” pattern to ensure even coverage. Let the primer dry completely according to the manufacturer’s instructions. Some stains or very dark paneling may require a second coat of primer to achieve a solid, uniform base.
Step 5: Applying the Topcoat
With the primer fully cured, you can finally apply your chosen color. The process is identical to the priming step. Start by cutting in with your brush along all the edges and then painting the grooves. Once the brushwork is complete, use a fresh roller cover to apply the paint to the flat sections. The key to a professional finish is to apply two thin coats of paint rather than one thick, heavy coat.
A thick coat is more likely to drip, sag, and show roller marks. Allow the first coat to dry completely before applying the second. If you notice any grit or imperfections after the first coat, you can very lightly sand the area with fine-grit sandpaper (220-grit) and wipe it clean before applying the final coat.
Managing the Grooves: To Fill or Not to Fill?
Managing the Grooves
The characteristic grooves of wood paneling present a stylistic choice. Painting them the same color as the rest of the wall is the most common and straightforward approach. The grooves add a subtle texture and verticality to the room, which can be quite pleasing. However, for those who truly desire the appearance of a flat, modern wall, there is the option to fill the grooves.
Painting the Grooves
Painting the grooves can enhance the texture of the paneling and give the wall a sophisticated character without overwhelming the space. A simple coat of paint in a cohesive color allows the grooves to blend beautifully into the design while maintaining their distinct tactile detail.
Filling the Grooves
For those seeking a flat, seamless surface, filling the grooves is a more intensive solution. This involves using a putty knife to apply spackle or wood filler into each groove, often requiring multiple applications due to shrinkage. Each layer needs to be sanded smooth, a process that can generate significant dust and extend the project dramatically. While this method offers a modern, flat finish, it requires a higher investment of time and effort. For many, celebrating the natural charm of the grooves through painting strikes the perfect balance between aesthetic enhancement and practicality.
Long-Term Durability and Care
Ensuring Durability Through Proper Preparation
Your newly painted walls, if prepared correctly, should be just as durable as any other painted surface in your home. The bonding primer creates a powerful link between the old paneling and the new paint, preventing the chipping and peeling that often accompanies improperly prepped jobs. This foundational step ensures that your efforts will stand the test of time.
Caring for Your Painted Walls
To maintain the look and durability of your painted walls, treat them as you would any other painted surface. They can be gently wiped down with a damp cloth and a mild cleaner to remove dirt or smudges.
The quality of your topcoat paint plays a vital role here; higher-quality paints with a satin or semi-gloss sheen provide better resistance to scuffs and stains compared to flat or matte finishes. By investing time in thoughtful preparation and selecting durable materials, you haven’t just made a temporary improvement—you’ve achieved a lasting transformation that will brighten your space for years to come.
Conclusion
The decision to paint over old wood paneling is a commitment to a process. It acknowledges that a beautiful final coat of paint is merely the visible evidence of the less glamorous, but far more important, work that came before it. By thoroughly cleaning away years of grime, mechanically dulling the glossy finish, and applying a tenacious bonding primer, you are systematically overcoming the inherent challenges of the material.
This project is a powerful demonstration of how thoughtful preparation can achieve a transformation that is both dramatic and enduring. Knowing how to paint over wood paneling is more than just a DIY skill; it’s an understanding of how to work with a challenging surface to unlock the potential hidden within a dated room, replacing the dark and heavy with the light, bright, and modern.
About
Mike May is a distinguished figure in the world of woodworking and timber design, with a decade of expertise creating innovative and sustainable indoor solutions. His professional focus lies in merging traditional craftsmanship with modern manufacturing techniques, fostering designs that are both practical and environmentally conscious. As the author of Woodimber, Mike delves into the art and science of timber-craft, inspiring artisans and industry professionals alike.
Education
RMIT University (Melbourne, Australia)
-
Associate Degree in Design (Timber): Focus on sustainable design, industry-driven projects, and practical craftsmanship.
-
Gained hands-on experience with traditional and digital manufacturing tools, such as CAD and CNC software.
Nottingham Trent University (United Kingdom)
-
Bachelor’s in Woodworking and Product Design (Honors): Specialized in product design with a focus on blending creativity with production techniques.
-
Participated in industry projects, working with companies like John Lewis and Vitsoe to gain real-world insights.
Publications and Impact
In Woodimber, May shares his insights on timber design processes, materials, and strategies for efficient production. His writing bridges the gap between artisan knowledge and modern industry needs, making it a must-read for both budding designers and seasoned professionals.