 (1)")

A desk is more than just a piece of furniture; it’s the command center for your work, study, or creative pursuits. If you have an old desk that’s seen better days, or a new one that just doesn’t fit your style, a fresh coat of paint can work wonders. This simple DIY project is a budget-friendly way to transform a tired piece into something you love, perfectly matching your room’s aesthetic.

Learning how to paint a desk is an achievable and rewarding project, even for absolute beginners. With the right preparation and a little bit of patience, you can upcycle a drab desk into a stunning centerpiece that looks brand new. This guide will walk you through the process, ensuring a smooth, durable finish that will inspire productivity and creativity for years to come.
Why Painting a Desk is a Smart Choice
Choosing to paint a desk is one of the most impactful and cost-effective upgrades you can make to your home office or study area. It allows you to salvage a structurally sound but aesthetically dated piece of furniture, keeping it out of a landfill and saving you the expense of buying new. This project gives you complete creative freedom.
You can select a bold color to make a statement, a calming neutral to create a serene workspace, or a classic white for a clean, timeless look. Beyond the visual appeal, a proper paint job adds a protective layer, making the surface more durable and easier to clean. It’s a project that offers a high return on investment, both in style and function.
Step-by-Step Guide on How to Paint a Desk
Step 1: Prepare Your Workspace and Gather Supplies
Before you begin, setting up a proper workspace is crucial for a clean, professional result. Find a well-ventilated area, like a garage with the door open or an outdoor patio, to protect yourself from fumes. Lay down a large drop cloth to protect your floors from drips and dust. You will need to gather all your supplies: sandpaper in various grits (medium and fine), wood filler, a tack cloth, high-quality primer, your chosen paint (latex or acrylic enamel works well), a clear topcoat for durability, painter’s tape, and your application tools, such as brushes, rollers, or a paint sprayer. Having everything on hand before you start will make the process much more efficient and enjoyable.

Step 2: Clean and Disassemble the Desk
A clean surface is non-negotiable for good paint adhesion. Begin by thoroughly cleaning the entire desk with a degreasing cleaner or a simple mixture of soap and water to remove any dirt, grime, or oils that have accumulated over time. After cleaning, wipe it down with a damp cloth and let it dry completely. Next, disassemble any parts you can. Remove all drawers, knobs, and hardware. This extra step makes it significantly easier to paint every nook and cranny without getting paint on the metal parts. Keep all your screws and hardware in a labeled bag so reassembly is a breeze.
Step 3: Fill, Repair, and Sand the Surface
Now it is time to create a perfectly smooth canvas for your paint. Inspect the desk for any scratches, dents, or gouges. Apply a small amount of wood filler to these imperfections using a putty knife, slightly overfilling each spot. Once the filler is completely dry, you can begin sanding. Start with a medium-grit sandpaper (around 120-grit) to sand down the filler and scuff up the entire surface of the desk. This light abrasion helps the primer grip the surface. If you are painting over a glossy finish, this step is especially important. You are not trying to remove the old finish, just dull its shine.
Step 4: A Guide on How to Paint a Desk Smoothly
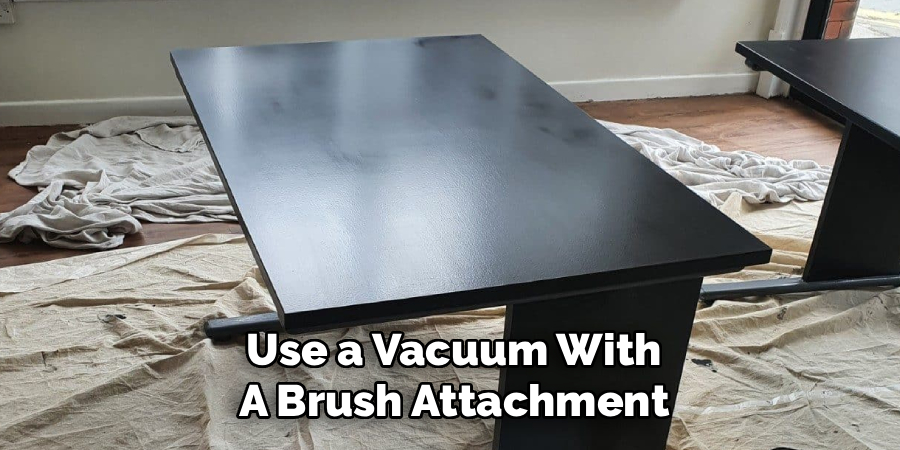
After your initial sanding, the key to a glass-smooth finish is to remove every speck of dust. Use a vacuum with a brush attachment to get the bulk of the sanding dust off the desk and out of the corners. Follow this with a tack cloth, which is a sticky piece of cheesecloth designed specifically to pick up the fine particles that a vacuum or rag leaves behind. Wipe down the entire desk gently with the tack cloth just before you are ready to apply your primer. This meticulous cleaning ensures that you will not have any gritty bumps or imperfections trapped under your paint.
Step 5: Apply a High-Quality Primer
Primer is the secret to a durable, professional-looking paint job. It creates a uniform base, blocks stains from bleeding through, and ensures the final paint color looks true and vibrant. Apply a thin, even coat of a quality bonding primer to the entire desk, including the drawers. A small foam roller is excellent for covering large flat surfaces quickly, while an angled brush is perfect for getting into corners and detailed areas. Let the primer dry completely according to the manufacturer’s instructions. Once dry, you may want to lightly sand the primed surface with fine-grit sandpaper (220-grit) for an ultra-smooth base.
Step 6: Sand Lightly Between Coats
This step is what separates a good paint job from a great one. After your primer is dry, and after each subsequent coat of paint, you should lightly sand the entire surface. Use a very fine-grit sandpaper (220-grit or higher) and apply gentle pressure. You are not trying to remove the layer you just applied, but rather to knock down any tiny bumps, dust nibs, or brush marks that may have occurred. This process creates a progressively smoother surface with each layer, leading to a factory-like finish. Remember to wipe away the sanding dust with a tack cloth after each sanding session before applying the next coat.
Step 7: Apply the First Coat of Paint
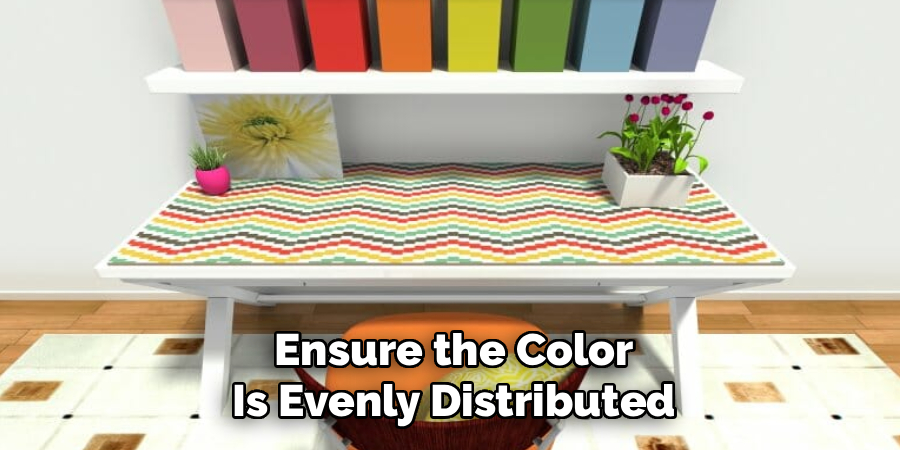
Now for the exciting part—adding color. Stir your paint thoroughly to ensure the color is evenly distributed. Using a high-quality brush or a mini foam roller, apply a thin, even coat of paint to the desk and drawers. Work in the direction of the wood grain for the smoothest appearance. Avoid the temptation to apply a thick coat to get it done faster; multiple thin coats are always better than one thick, goopy one. A thick coat is more likely to drip, bubble, and take an extremely long time to cure properly. Take your time and focus on achieving even coverage across the entire piece.
Step 8: Apply the Final Coat and Topcoat
Let the first coat of paint dry completely, following the recommended time on the paint can. After it has dried, give it another light sanding with fine-grit sandpaper and wipe it clean with a tack cloth. Then, apply your second and final coat of paint. This second coat will deepen the color and cover any areas that looked thin or streaky after the first pass. Once the final paint coat has fully cured (which can take 24 hours or more), it is time to add protection. Apply two to three thin coats of a clear, water-based polycrylic or polyurethane topcoat to protect the desk from scratches, scuffs, and spills.
Frequently Asked Questions
What Is the Best Paint to Use on a Desk?
The best paint for a desk is one that offers high durability.
- Acrylic Enamel or Latex Paint: High-quality interior acrylic-latex paints are a great choice as they are durable, easy to clean, and low in odor.
- Chalk Paint: Offers a matte, vintage look and often requires less prep work (sanding/priming), but it absolutely needs a protective topcoat (like wax or polycrylic) to be durable enough for a desk surface.
- Alkyd Paint: This is a water-based paint that cures to a hard, oil-like finish, offering excellent durability.
Do I Really Need to Sand Before Painting?
Yes, sanding is a critical step for almost all projects.
- Adhesion: Sanding creates microscopic grooves in the surface that give the primer and paint something to grip onto.
- Glossy Surfaces: If your desk has a glossy finish, scuff sanding is non-negotiable. Paint will simply peel or scratch off a slick surface.
- Exception: The only time you might skip sanding is if you are using a specialized chalk paint or a primer designed for slick surfaces, but even then, a light scuffing is recommended for best results.
Should I Use a Brush, Roller, or Sprayer?

This depends on the finish you want and your comfort level.
- Brush: Offers the most control for details and corners. High-quality brushes minimize stroke marks.
- Foam Roller: Excellent for applying thin, even coats on large flat surfaces like the desktop and sides, resulting in a smooth finish.
- Paint Sprayer: Provides the most professional, flawless, factory-like finish with no brush or roller marks. However, it requires more setup, cleanup, and practice to use correctly.
How Long Should I Wait Before Using the Desk?
Patience is key. Paint needs time to cure, not just dry.
- Dry Time: Paint may feel dry to the touch in a few hours.
- Cure Time: Curing is the process of the paint hardening to its maximum durability. This can take anywhere from a few days to a full month, depending on the paint, temperature, and humidity.
- Recommendation: It’s best to wait at least 3-4 days before placing heavy items like monitors or lamps on the surface. Use it lightly for the first few weeks if possible.
How Do I Prevent Paint from Peeling or Chipping?
Proper preparation and protection are the secrets to a long-lasting finish.
- Clean and Sand: Never skip the cleaning and scuff-sanding steps.
- Use Primer: Always use a high-quality bonding primer.
- Apply a Topcoat: A clear protective topcoat (like polycrylic) is the most important step for protecting a high-traffic surface like a desktop from scratches and wear. Apply 2-3 coats for maximum protection.
Conclusion
Giving a desk a new lease on life is a deeply satisfying project that can completely elevate a room. By following a methodical process of cleaning, sanding, priming, and painting, you can achieve a finish that is not only beautiful but also incredibly durable. The most important takeaways are to never skip the prep work and to have the patience to apply multiple thin coats, allowing for proper drying time in between. The effort you put into the details will pay off in the final result.
Now that you have a comprehensive understanding of how to paint a desk, you are fully equipped to tackle this project with confidence. Go ahead and choose your color, grab your supplies, and get ready to create a custom piece of furniture that you will be proud to use every day.
About
Mike May is a distinguished figure in the world of woodworking and timber design, with a decade of expertise creating innovative and sustainable indoor solutions. His professional focus lies in merging traditional craftsmanship with modern manufacturing techniques, fostering designs that are both practical and environmentally conscious. As the author of Woodimber, Mike delves into the art and science of timber-craft, inspiring artisans and industry professionals alike.
Education
RMIT University (Melbourne, Australia)
-
Associate Degree in Design (Timber): Focus on sustainable design, industry-driven projects, and practical craftsmanship.
-
Gained hands-on experience with traditional and digital manufacturing tools, such as CAD and CNC software.
Nottingham Trent University (United Kingdom)
-
Bachelor’s in Woodworking and Product Design (Honors): Specialized in product design with a focus on blending creativity with production techniques.
-
Participated in industry projects, working with companies like John Lewis and Vitsoe to gain real-world insights.
Publications and Impact
In Woodimber, May shares his insights on timber design processes, materials, and strategies for efficient production. His writing bridges the gap between artisan knowledge and modern industry needs, making it a must-read for both budding designers and seasoned professionals.