 (1)")

Building your own collapsible wooden box offers a highly rewarding weekend project that combines practical utility with fundamental woodworking skills. Wooden boxes are incredibly useful for storage, transport, and organization.
However, traditional rigid boxes take up significant space when empty. By adding a clever folding mechanism using strategically placed hinges, you solve the storage problem completely.
This guide on how to build a collapsible wooden box walks you through the entire process of planning, cutting, assembling, and finishing a durable wooden box that folds perfectly flat when not in use. We will cover the materials required, detailed step-by-step instructions, and crucial mistakes to avoid so your project turns out perfectly on the first try.

What Will You Need?
Before making any cuts, gather your tools and materials. Having everything organized in your workspace will make the building process smooth and enjoyable.
Materials:
- One 4×8 sheet of 1/2-inch or 3/4-inch sanded plywood (Birch or Pine works best)
- Four to six continuous piano hinges or 12 small utility hinges
- Two locking clasps or draw latches for the corners
- Wood glue
- Wood filler
- Sandpaper (120-grit and 220-grit)
- Wood stain or protective polyurethane finish
- Short wood screws (ensure they are shorter than the thickness of your wood)
Tools:
- Measuring tape and a pencil
- Carpenter’s square
- Table saw, or circular saw with a straight-edge guide
- Power drill with pilot hole bits and Phillips head driver
- Clamps to hold pieces steady during assembly
- Safety glasses and hearing protection
10 Easy Steps on How to Build a Collapsible Wooden Box
Step 1: Measure and Plan Your Dimensions
Accurate planning dictates the success of any folding mechanism. Determine the final dimensions you want for your box. For this guide, we will imagine a box that is 24 inches long, 16 inches wide, and 12 inches deep. Use your measuring tape and pencil to mark these dimensions onto your plywood sheet. You will need one base piece, two long side panels, and two short end panels. Pay careful attention to the folding geometry; the end panels must be slightly shorter in height than the side panels so they can fold inward without overlapping clumsily. Double-check all measurements with your carpenter’s square to ensure every corner remains perfectly at 90 degrees.

Step 2: Cut the Base and Side Panels
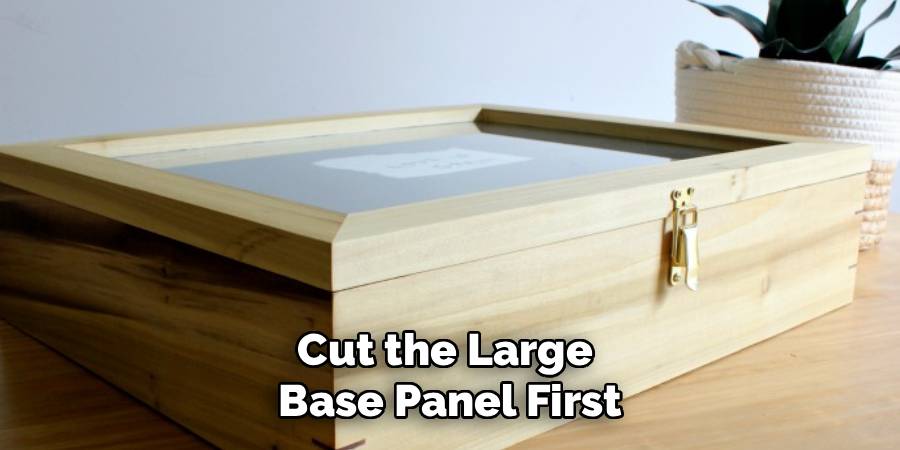
Put on your safety glasses and hearing protection. Using a table saw or a circular saw with a straight-edge guide, carefully execute the cuts you marked in the previous step. Push the wood through the blade smoothly to prevent splintering. Cut the large base panel first. Next, cut the two long side panels. Finally, cut the two short end panels. Keep your cuts as straight as possible, as uneven edges will cause the hinges to bind when you attempt to fold the box. Once all five primary pieces are cut, lay them out on your workbench to verify that they match your intended dimensions.
Step 3: Sand the Edges for a Smooth Finish
Raw plywood edges feel rough and easily cause splinters. Take your 120-grit sandpaper and thoroughly sand the flat surfaces and the freshly cut edges of all five panels. Pay special attention to the corners, rounding them over slightly to make the box more comfortable to handle. Once the rough edges are gone, switch to your 220-grit sandpaper for a final smoothing pass. Wipe away all the resulting sawdust with a tack cloth or a slightly damp rag. A clean, smooth surface guarantees that your hinges will mount flush and your final protective finish will adhere properly.
Step 4: Map Out the Hinge Placement
A collapsible box relies on precise hinge placement. Lay the base panel flat on your workbench. Arrange the four side panels around the base, laying them flat on the table facing outward, like an unfolded cardboard box. Use a pencil to mark exactly where each hinge will go. For the two long sides, the hinges must mount directly to the top edge of the base panel. For the two short sides, you will need to mount the hinges slightly higher, either by attaching a small spacer block to the base or by offsetting the hinges. This offset allows the short sides to fold down first, and the long sides to fold down flat on top of them.
Step 5: Pre-Drill the Hinge Pilot Holes
Never drive screws directly into thin wood without pre-drilling, as this will almost certainly split the plywood and ruin your panels. Place your hinges over the pencil marks you made in the previous step. Use an awl or a sharp pencil to mark the exact center of every screw hole. Select a drill bit that is slightly smaller in diameter than the threads of your mounting screws. Carefully drill shallow pilot holes at every mark. Use a piece of tape wrapped around your drill bit as a depth gauge so you do not accidentally drill all the way through the panels.
Step 6: Attach the First Set of Hinges to the Base
Begin the actual assembly by securing the hinges to the base panel first. Line up your hinges with the pilot holes on the base. Drive the screws in slowly using your power drill or a manual screwdriver. Drive them firmly, but be careful not to over-tighten, which can strip the wood fibers and loosen the connection. Attach all the necessary hinges around the perimeter of the base panel before you attempt to connect any of the side walls.
Step 7: Connect the Folding Side Panels
With the hinges securely fastened to the base, it is time to attach the side panels. Prop up one of the side panels so it aligns with the vertical half of its corresponding hinge. You may need a helper or some sturdy right-angle clamps to hold the panel steady while you work. Drive the screws through the hinge and into the pilot holes on the side panel. Repeat this process for all four sides. At this stage, your project will actually start looking like a functional box.

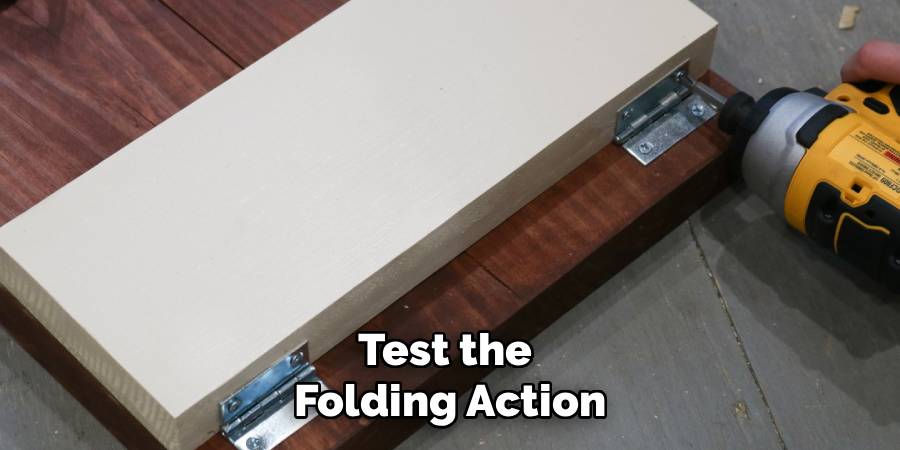
Step 8: Test and Adjust the Folding Mechanism
Before adding any latches or finishes, you must test the folding action. Fold the short side panels inward toward the base. Then, fold the long side panels down on top of them. The panels should lie relatively flat without excessive binding or resistance. If the wood rubs tightly or prevents the panels from folding, you may need to unscrew a hinge and adjust its position slightly. Minor adjustments at this stage are completely normal and ensure a flawless operation later. Take your time to get the geometry exactly right.
Step 9: Install the Corner Latches
When the box is fully upright, the sides need a way to lock together to provide structural integrity. Raise all four panels into their vertical box shape. Install draw latches or simple hook-and-eye closures at the top corners where the panels meet. Mount the latch on the long side panel and the catch on the short side panel. Pre-drill these holes just as you did for the hinges. Secure the latches and snap them closed. Your box should now feel sturdy and rigid, capable of holding weight without collapsing inward.
Step 10: Apply a Protective Wood Finish
The final step protects your hard work from moisture, dirt, and wear. Take the box apart slightly or lay it completely flat to expose all surfaces. Apply a coat of wood stain if you want to alter the color, wiping away the excess with a clean rag. Allow the stain to dry completely according to the manufacturer’s instructions. Next, apply a clear coat of protective polyurethane using a high-quality brush. Let the first coat dry, sand it very lightly with 220-grit paper, and apply a second coat. Once fully cured, your collapsible wooden box is officially complete and ready for years of use.
5 Things You Should Avoid
- Avoid using warped or bowed wood. Plywood must be perfectly flat for a folding mechanism to work. If your wood has a severe bow, the panels will grind against each other and fail to fold properly.
- Avoid screws that are too long. Measure the thickness of your wood carefully. If your screws protrude through the other side, they become a dangerous hazard that will snag your hands and whatever items you store inside.
- Avoid skipping the pilot holes. Driving screws close to the edge of plywood without a pilot hole causes immediate splitting. This drastically weakens the hinge connection and forces you to cut replacement pieces.
- Avoid bulky door hinges. Standard residential door hinges have thick barrels that prevent panels from sitting flush against each other. Stick to low-profile piano hinges, strap hinges, or narrow utility hinges.
- Avoid painting the hinge barrels. When applying your final finish, keep paint and thick polyurethane out of the actual hinge mechanism. A buildup of paint will lock the hinges solid and destroy your collapsibility.
Conclusion
How to build a collapsible wooden box provides a highly practical solution for your storage and transportation needs.
By taking the time to measure precisely, cutting straight lines, and installing the right hardware, you create a versatile container that easily adapts to your lifestyle. The combination of rigid utility when assembled and incredibly flat storage when disassembled makes this a superior alternative to standard crates.
Take pride in your craftsmanship, utilize your new storage solution, and enjoy the clean, organized space you have just created.
About
Mike May is a distinguished figure in the world of woodworking and timber design, with a decade of expertise creating innovative and sustainable indoor solutions. His professional focus lies in merging traditional craftsmanship with modern manufacturing techniques, fostering designs that are both practical and environmentally conscious. As the author of Woodimber, Mike delves into the art and science of timber-craft, inspiring artisans and industry professionals alike.
Education
RMIT University (Melbourne, Australia)
-
Associate Degree in Design (Timber): Focus on sustainable design, industry-driven projects, and practical craftsmanship.
-
Gained hands-on experience with traditional and digital manufacturing tools, such as CAD and CNC software.
Nottingham Trent University (United Kingdom)
-
Bachelor’s in Woodworking and Product Design (Honors): Specialized in product design with a focus on blending creativity with production techniques.
-
Participated in industry projects, working with companies like John Lewis and Vitsoe to gain real-world insights.
Publications and Impact
In Woodimber, May shares his insights on timber design processes, materials, and strategies for efficient production. His writing bridges the gap between artisan knowledge and modern industry needs, making it a must-read for both budding designers and seasoned professionals.