 (1)")

Hardwood floors are a timeless feature in any home, adding warmth, elegance, and value. However, over time, foot traffic, sunlight, and everyday wear can leave them looking dull and lifeless. While many homeowners assume that refinishing is the only solution, often all your floors need is a good waxing to restore their original luster. Waxing not only beautifies the wood but also provides a crucial protective layer against scratches and moisture.

Learning how to wax a hardwood floor is a straightforward DIY project that can save you the significant expense of hiring professionals. It doesn’t require heavy machinery or specialized skills—just the right products and a bit of patience.
This guide is designed for beginners, walking you through the entire process from preparation to the final buff. We will cover how to identify if your floor is suitable for wax, how to clean it properly, and the best techniques for applying a smooth, durable finish. get ready to transform your living space and bring that showroom shine back to your home.
Why Waxing Is Essential for Wood Longevity
Applying wax to your hardwood floors does more than just make them look pretty; it is a vital maintenance step that extends the life of the timber. Think of wax as a sacrificial layer. When people walk on the floor, they are wearing down the wax rather than the wood fibers or the finish underneath. This barrier protects against minor scratches, scuffs from shoes, and even small spills that might otherwise seep into the grain and cause staining or warping.
Furthermore, wax fills in microscopic imperfections and pores in the wood, creating a smooth, uniform surface that reflects light beautifully. This added sheen can make a room feel brighter and cleaner. Regular waxing also makes routine cleaning easier, as dust and dirt sit on top of the wax rather than grinding into the floorboards. By investing a little time in this process, you are actively preserving the structural integrity and aesthetic appeal of your investment for years to come.
Step-by-Step Guide on How to Wax a Hardwood Floor
Step 1: Determine If Your Floor Can Be Waxed
Before you buy any products, you must confirm that your floor is compatible with wax. Not all finishes are suitable for waxing. Floors with a polyurethane, varnish, or shellac finish usually do not require wax and can actually become dangerously slippery or cloudy if wax is applied. To test this, dampen a microfiber cloth and wipe a small, inconspicuous area.

If the water beads up and sits on the surface, you likely have a modern sealed finish that should not be waxed. If the water soaks in and darkens the wood, the floor has a penetrating seal or an oil finish, making it a perfect candidate for waxing. Knowing how to wax a hardwood floor starts with this critical compatibility check to avoid ruining your finish.
Step 2: Clear the Room and Prepare the Space
To achieve a professional-looking result, you need an empty canvas. Start by removing all furniture, rugs, and obstacles from the room. It might be tempting to work around heavy items like sofas or bookcases, but this will leave visible lines and uneven protection where the old wax meets the new. Once the room is empty, inspect the floor for any protruding nails or loose boards that might snag your applicator pad. Open windows and doors to ensure good ventilation, as some waxes and stripping agents can have strong fumes. Good airflow also helps the wax dry evenly. Taking the time to fully clear the space ensures you can work efficiently without stopping to move objects.
Step 3: Strip the Old Wax Build-Up
Applying fresh wax over dirty, yellowing layers of old wax will result in a tacky, dull mess. You need to strip the floor down to its base. Use a commercial wax stripper or a mineral spirits solution recommended by the manufacturer. Apply the stripping solution to a small section of the floor, let it sit for the specified time to dissolve the old coating, and then scrub gently with fine steel wool (grade 0000) or a stiff brush. Work in manageable sections, roughly two feet by two feet, wiping up the dissolved residue with clean rags as you go. This labor-intensive step is crucial for revealing the true beauty of the wood grain underneath.
Step 4: Thoroughly Clean and Dry the Surface
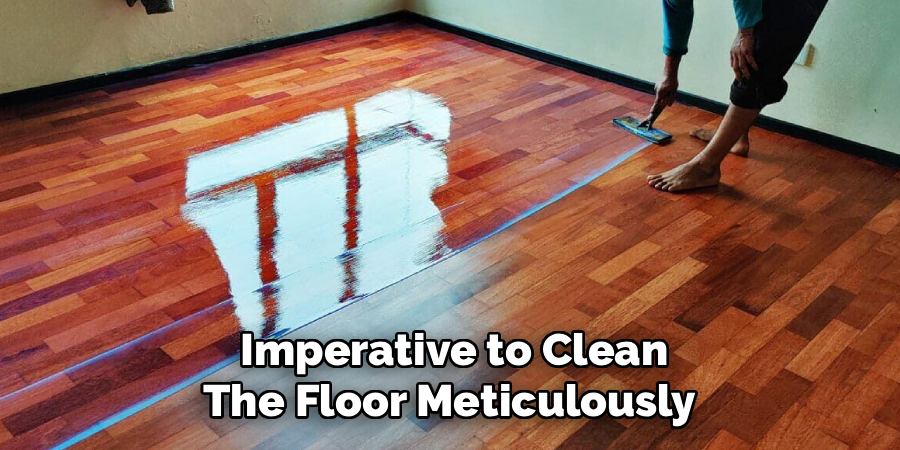
Once the old wax is removed, your floor will likely have some residue from the stripping process. It is imperative to clean the floor meticulously before applying the new wax. Vacuum the entire area to remove any steel wool fragments or dust. Follow this with a damp mop using a mild wood floor cleaner or a mixture of vinegar and water, ensuring the mop is well-wrung to avoid saturating the wood. Any dust or hair left on the floor will get trapped in the new wax, creating permanent bumps in your finish. Allow the floor to dry completely, checking for any missed spots. A pristine, dry surface is the foundation for a flawless wax application.
Step 5: Select the Right Type of Wax
There are two main types of floor wax: liquid wax and paste wax. Liquid wax is generally easier to apply and is best for unsealed wood or cork floors. It can be spread with a mop and dries relatively quickly. Paste wax, on the other hand, is thicker and requires more elbow grease to apply, but it offers a deeper, longer-lasting shine and better protection. It is traditionally used on older floors or unvarnished hardwood. Read the labels carefully to choose the product that matches your specific wood type and desired finish level. Ensure you have high-quality, lint-free cloth rags or a specialized wax applicator ready for the next phase.
Step 6: Apply the First Thin Coat of Wax
Dip your lint-free cloth or applicator pad into the wax. If using paste wax, take a small amount, about the size of a golf ball, and wrap it inside a piece of cheesecloth to prevent lumps. Start in the corner of the room furthest from the exit so you do not paint yourself into a corner. Apply the wax in a thin, even layer, working in small sections and following the direction of the wood grain. The goal is to coat the surface lightly; thick layers take forever to dry and can remain sticky. This technique is a key part of understanding how to wax a hardwood floor correctly. Consistent, thin coverage is far superior to a single heavy coat..

Frequently Asked Question
How Often Should I Wax My Hardwood Floors?
The frequency depends heavily on the amount of foot traffic the room receives.
- High-Traffic Areas: Kitchens, hallways, and living rooms typically need waxing every 6 to 12 months.
- Low-Traffic Areas: Bedrooms and formal dining rooms can often go 18 months to 2 years between waxings.
- The Test: If the floor looks dull even after cleaning, or if it stops repelling water droplets, it is time for a fresh coat.
Can I Wax a Floor That Has Polyurethane Finish?
Generally, no. You should not wax a floor with a polyurethane finish.
- Adhesion Issues: Wax will not adhere properly to the plastic-like surface of polyurethane.
- Safety Hazard: It can make the floor extremely slippery and dangerous.
- Maintenance Nightmare: Applying wax prevents you from easily recoating the floor with polyurethane in the future without extensive stripping. Use a polish designed for polyurethane floors instead.
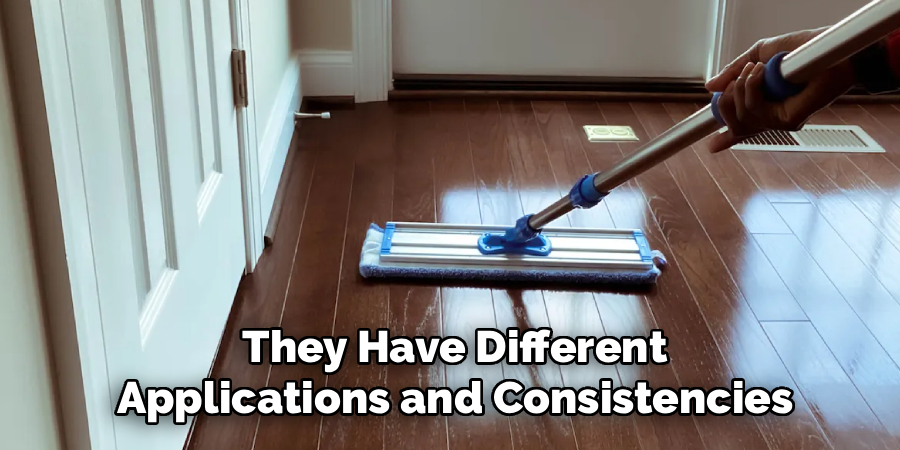
What Is the Difference Between Paste Wax and Liquid Wax?
Both protect wood, but they have different applications and consistencies.
- Paste Wax: Contains more solids and less solvent. It is harder to apply but provides a thicker, longer-lasting protective layer. It is ideal for unvarnished floors, antiques, and furniture.
- Liquid Wax: Contains more solvents, making it easier to spread with a mop. It is excellent for cleaning and protecting in one step but may require more frequent application than paste wax.
How Do I Fix a Smudged or Sticky Wax Job?
If your floor feels sticky or shows smudges after waxing, it usually means you applied too much product or didn’t let it dry enough.
- Buff It Out: First, try buffing the area vigorously with a clean, dry cloth to remove excess wax.
- Mineral Spirits: If buffing fails, dampen a cloth with mineral spirits and wipe the sticky area gently to remove the excess layer, then let it dry and buff again.
Do I Need a Machine to Buffer the Floor?
While not strictly necessary, an electric buffer makes a huge difference.
- Manual Buffing: You can buff by hand using soft cloths, but it is physically exhausting and difficult to get a uniform, high-gloss shine over a large area.
- Machine Buffing: Renting a buffer saves time and energy, and the weight of the machine provides the friction needed for a hard, durable, professional-quality finish.
Conclusion
Revitalizing your hardwood floors doesn’t have to be an intimidating chore. By understanding the specific needs of your wood and following a systematic approach, you can achieve results that rival a professional restoration. The key lies in preparation—ensuring the old wax is stripped and the surface is pristine—and in the patience to apply thin layers and buff them thoroughly. A well-waxed floor transforms the ambiance of a room, reflecting light and adding a depth of character that synthetic flooring simply cannot match.
Remember that regular maintenance is the secret to keeping that shine alive. A little care goes a long way in preserving the warmth and beauty of your home. Now that you are equipped with the knowledge of how to wax a hardwood floor, you can confidently tackle this project and enjoy the satisfaction of walking on gleaming, protected surfaces for years to come.
About
Mike May is a distinguished figure in the world of woodworking and timber design, with a decade of expertise creating innovative and sustainable indoor solutions. His professional focus lies in merging traditional craftsmanship with modern manufacturing techniques, fostering designs that are both practical and environmentally conscious. As the author of Woodimber, Mike delves into the art and science of timber-craft, inspiring artisans and industry professionals alike.
Education
RMIT University (Melbourne, Australia)
-
Associate Degree in Design (Timber): Focus on sustainable design, industry-driven projects, and practical craftsmanship.
-
Gained hands-on experience with traditional and digital manufacturing tools, such as CAD and CNC software.
Nottingham Trent University (United Kingdom)
-
Bachelor’s in Woodworking and Product Design (Honors): Specialized in product design with a focus on blending creativity with production techniques.
-
Participated in industry projects, working with companies like John Lewis and Vitsoe to gain real-world insights.
Publications and Impact
In Woodimber, May shares his insights on timber design processes, materials, and strategies for efficient production. His writing bridges the gap between artisan knowledge and modern industry needs, making it a must-read for both budding designers and seasoned professionals.