 (1)")

Painting the wood trim in your home is one of the most effective ways to refresh a room and create a clean, cohesive look. A fresh coat of paint on baseboards, window casings, and door frames can instantly brighten a space, making it feel more modern and polished. However, many homeowners are intimidated by this task, worried about getting crisp lines and a smooth, durable finish.

The good news is that with the right preparation and technique, it’s a completely achievable DIY project. Learning how to paint wood trim properly is all about patience and process. This guide is designed for beginners and will walk you through every step, from sanding and priming to the final brushstroke, ensuring a professional-quality result you can be proud of.
Why Painting Trim Makes a Huge Impact
A fresh coat of paint on your trim does more than just cover up scuffs and dings; it fundamentally redefines the character of a room. Dated, honey-oak trim from decades past can make a space feel dark and heavy. By painting it a crisp white or a modern neutral, you instantly lift the room, making it feel brighter, larger, and more current.
Painted trim frames your walls and windows, providing a clean visual border that makes your wall color pop. It’s a small detail that offers a massive return on investment, tying the entire design of a room together. This simple update can dramatically increase your home’s appeal without the cost or hassle of a full renovation.
Step-by-Step Guide on How to Paint Wood Trim
Step 1: Clean the Trim and Gather Your Supplies
Before you even think about opening a can of paint, you must thoroughly clean your trim. Baseboards and window sills accumulate a surprising amount of dust, grime, and oils that can prevent paint from adhering properly. Use a degreasing cleaner or a simple soap and water solution with a sponge to wipe down all surfaces. For stubborn grime, a magic eraser can work wonders. Once clean, gather your supplies: high-quality painter’s tape, wood filler, a sanding sponge, tack cloths, a good bonding primer, your chosen paint, and high-quality brushes. Having everything ready will make the entire project run more smoothly and efficiently.

Step 2: Fill Holes and Make Necessary Repairs
Now is the time to create a perfectly smooth surface. Carefully inspect all your trim for nail holes, dents, scratches, or gaps. Use a high-quality, paintable wood filler to fill in any imperfections. Apply it with a putty knife, slightly overfilling each hole to account for shrinkage as it dries. For any gaps between the trim and the wall, apply a thin, smooth bead of paintable caulk. Run your finger along the caulk line to create a seamless transition. Let the filler and caulk dry completely according to the manufacturer’s instructions. This step is crucial for achieving a flawless, professional finish.
Step 3: Sand the Wood Trim for Proper Adhesion
Sanding is a non-negotiable step for a durable paint job, especially if your trim has a glossy finish. The goal is not to remove the old paint or varnish, but to “scuff up” the surface, creating microscopic grooves that give the primer something to grip onto. Use a medium-grit sanding sponge (around 120-180 grit), as it conforms easily to the contours of decorative trim. Sand every surface that will be painted until the shine is gone and the surface feels slightly rough. After sanding, vacuum up the dust and then wipe everything down with a tack cloth to remove any remaining particles.
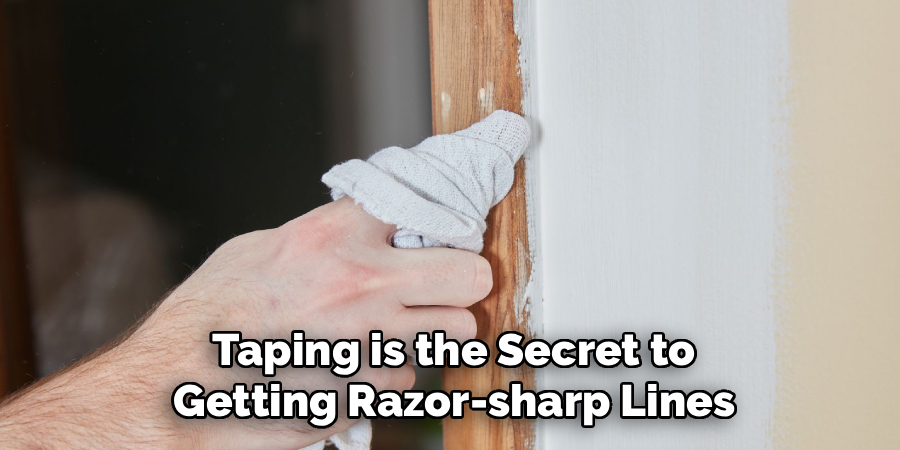
Step 4: Trim with Crisp Lines
Taping is the secret to getting razor-sharp lines between your trim and walls. Use a high-quality painter’s tape, as cheaper versions can bleed or pull paint off the wall when removed. Apply the tape firmly along the edge where the trim meets the wall, floor, and any other adjacent surface. Use a putty knife or a credit card to press down on the edge of the tape, creating a tight seal. This small action is vital for preventing paint from seeping underneath. Take your time during this step; meticulous taping is one of the most important parts of learning how to paint wood trim like a pro.
Step 5: Apply a Coat of High-Quality Primer
Primer is the foundation of your paint job. It blocks stains, prevents old wood color from bleeding through, and provides a uniform base for your paint to adhere to, ensuring a true and even color. Using a high-quality 2-inch angled brush, apply a thin, even coat of a bonding primer to all the sanded and prepped trim. An angled brush gives you excellent control for cutting into corners and along taped edges. Avoid loading your brush with too much product to prevent drips and runs. Let the primer dry completely as recommended by the manufacturer.
Step 6: Apply the First Coat of Paint
Once the primer is dry, it is time for color. Choose a high-quality semi-gloss or satin finish paint, as these sheens are durable and easy to clean, making them ideal for high-traffic trim. Stir your paint thoroughly. Using your clean, angled brush, apply a thin, even coat of paint. Start at the top of the trim and work your way down, using long, smooth strokes. Don’t worry if the coverage looks a bit thin or streaky on this first pass; the purpose of this coat is to establish a base. Focus on avoiding drips and heavy application, as these are difficult to fix later.
Step 7: How to Paint Wood Trim with a Smooth Finish
After the first coat of paint is completely dry, you may notice some slight imperfections or a slightly rough texture. For an exceptionally smooth finish, you can very lightly sand the surface with a fine-grit sanding sponge (220-grit or higher). Be gentle; you are just knocking down any dust nibs or minor brush marks, not removing the paint. After this light sanding, wipe the trim again with a clean tack cloth to remove all dust. This extra step is what creates that silky, professional feel and ensures your second coat goes on flawlessly.

Step 8: Apply the Final Coat and Remove Tape
Apply your second and final coat of paint using the same technique as the first. This coat will provide full coverage, deepen the color, and create a uniform sheen. Work carefully and maintain a wet edge to avoid lap marks. Once you have finished painting the final coat, you should remove the painter’s tape while the paint is still slightly wet. Pulling the tape off at a 45-degree angle away from the trim will give you the cleanest possible line. If you wait for the paint to dry completely, you risk peeling off pieces of your new finish along with the tape.
Frequently Asked Questions
What Is the Best Paint Sheen for Wood Trim?
For wood trim, a semi-gloss or satin finish is highly recommended.
- Semi-Gloss: Offers a noticeable shine and is extremely durable and easy to clean, making it perfect for baseboards, windows, and doors that experience a lot of wear and tear.
- Satin: Has a lower luster than semi-gloss but is still quite durable and washable. It provides a more subtle, modern look that can help hide minor imperfections better than a shinier finish.
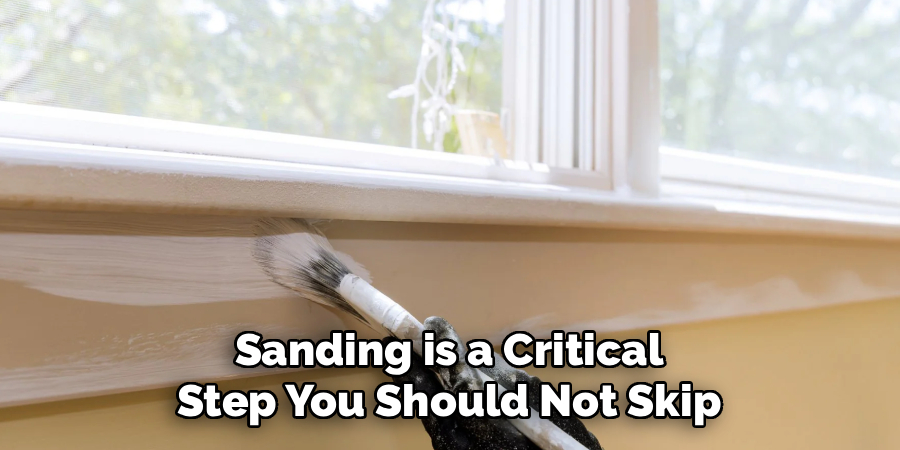
Do I Have to Sand Wood Trim Before Painting?
Yes, sanding is a critical step you should not skip.
- Adhesion: Sanding creates a rougher texture that allows the primer to bond securely to the surface. Without sanding, especially on glossy trim, your paint is very likely to chip or peel off easily.
- Smoothness: It also helps to smooth out any existing imperfections in the wood, leading to a much better final appearance. You are not trying to strip the old paint, just remove the shine.
Should I Use Oil-Based or Latex Paint?
For most DIY projects today, high-quality water-based (latex) paints are the best choice.
- Latex Paint: Modern acrylic-latex paints are durable, low-odor, easy to clean up with water, and dry much faster than oil-based options.
- Oil-Based Paint: While traditionally known for a hard, smooth finish, oil-based paints have strong fumes, require mineral spirits for cleanup, and can yellow over time. They are rarely necessary for interior trim anymore.
Can I Paint Over Stained Wood Trim?
Yes, you can absolutely paint over stained wood trim, but preparation is key.
- Prep: You must clean the stained trim thoroughly to remove any polish or grime.
- Sand: Lightly sand the surface to scuff up the varnish or lacquer topcoat.
- Prime: Use a high-quality, stain-blocking primer. This is the most important step, as it will prevent the wood tannins and stain color from bleeding through your new paint.
How Do I Avoid Brush Marks on My Trim?
Achieving a smooth, brush-mark-free finish involves a few key techniques.
- Use a High-Quality Brush: Cheap brushes will shed bristles and leave obvious strokes. Invest in a good 2-inch angled brush.
- Don’t Overload: Apply thin coats. Too much paint on the brush leads to drips and heavy marks.
- Paint Additives: Consider using a paint conditioner or extender (like Floetrol for latex paint). This slows down the drying time, allowing the paint to level out and the brush strokes to disappear.
Conclusion
Painting your wood trim is a project that delivers a significant visual reward for your effort. While it requires a methodical approach, the process is straightforward when broken down into manageable steps. The keys to success are rooted in meticulous preparation: cleaning, repairing, sanding, and taping correctly are just as important as the painting itself. By using quality materials and having the patience to apply thin, even coats, you can create a durable, professional-looking finish that completely transforms and modernizes your living space. Now that you know how to paint wood trim, you have the power to refresh your home and add lasting value and style.
About
Mike May is a distinguished figure in the world of woodworking and timber design, with a decade of expertise creating innovative and sustainable indoor solutions. His professional focus lies in merging traditional craftsmanship with modern manufacturing techniques, fostering designs that are both practical and environmentally conscious. As the author of Woodimber, Mike delves into the art and science of timber-craft, inspiring artisans and industry professionals alike.
Education
RMIT University (Melbourne, Australia)
-
Associate Degree in Design (Timber): Focus on sustainable design, industry-driven projects, and practical craftsmanship.
-
Gained hands-on experience with traditional and digital manufacturing tools, such as CAD and CNC software.
Nottingham Trent University (United Kingdom)
-
Bachelor’s in Woodworking and Product Design (Honors): Specialized in product design with a focus on blending creativity with production techniques.
-
Participated in industry projects, working with companies like John Lewis and Vitsoe to gain real-world insights.
Publications and Impact
In Woodimber, May shares his insights on timber design processes, materials, and strategies for efficient production. His writing bridges the gap between artisan knowledge and modern industry needs, making it a must-read for both budding designers and seasoned professionals.