 (1)")

Your kitchen cabinets are the visual anchor of the room, setting the tone for your entire home’s aesthetic. Over time, however, grease, sunlight, and daily wear can leave them looking dull, scratched, or outdated. Instead of spending thousands on a full renovation or buying brand-new units, you can achieve a stunning transformation with a simple can of stain. Staining enhances the natural beauty of the wood grain, adding warmth and depth that paint simply cannot replicate. It allows you to modernize your space while preserving the character of your existing cabinetry.

Learning how to stain wood cabinets is a rewarding DIY project that is surprisingly accessible for beginners. You do not need a workshop full of expensive tools or years of woodworking experience—just some patience and the right preparation. This guide will walk you through the entire process, from stripping the old finish to applying the final protective coat. By following these steps, you can save a significant amount of money and take pride in a kitchen that looks professionally updated. Let’s roll up our sleeves and give your cabinets the rich, beautiful finish they deserve.
Why Staining Is a Smart Choice for Cabinet Renewal
Choosing to stain rather than paint or replace your cabinets offers several distinct advantages. First and foremost, staining celebrates the material. Unlike paint, which covers the surface with an opaque layer, stain penetrates the wood fibers, highlighting the unique swirls, knots, and grain patterns that make timber so special. This creates a look of high-end craftsmanship and organic beauty that feels timeless rather than trendy. Whether you want a deep, rich espresso tone or a light, airy driftwood effect, stain offers versatility in color without hiding the wood’s natural texture.
From a practical standpoint, stained cabinets are often easier to maintain than painted ones. Chips and scratches tend to blend in better with stained wood, whereas they stand out starkly against a solid paint color. Furthermore, staining is incredibly cost-effective. The materials required—sandpaper, stain, and sealer—cost a fraction of what new cabinetry would run you. It is also an eco-friendly option, as you are reusing the existing cabinet boxes and doors rather than sending them to a landfill. This project is the perfect intersection of budget-friendly renovation and aesthetic upgrade.
Step-by-Step Guide on How to Stain Wood Cabinets
Step 1: Remove Doors, Drawers, and Hardware
The first and arguably most important step is to dismantle your cabinetry. You cannot effectively stain cabinets while they are hanging on the wall. Use a screwdriver or drill to remove all cabinet doors and pull out every drawer. As you work, take off all hinges, knobs, and handles. It is crucial to keep everything organized, so place the hardware in labeled bags—one for each cabinet if the hinges vary. Numbering the doors and their corresponding openings with a piece of painter’s tape ensures you can put everything back exactly where it belongs later. This preparation prevents frustration during reassembly and guarantees a professional finish.

Step 2: Clean and Degrease All Surfaces
Kitchens are naturally greasy environments, and over the years, a layer of cooking oil and grime has likely built up on your wood surfaces. If you try to sand or stain over this residue, you will simply grind the dirt into the wood pores, leading to blotchy, uneven color. Scrub every inch of the doors, drawer fronts, and cabinet frames with a strong degreaser or a solution of trisodium phosphate substitute. Use a scrubbing sponge to get into corners and detailed profiles. Rinse the wood thoroughly with a clean, damp cloth to remove any chemical residue and allow the wood to dry completely before moving on to sanding.
Step 3: Strip the Old Finish or Paint
Unless you are working with raw, unfinished wood, you must remove the existing layer of varnish, polyurethane, or old stain. Apply a chemical wood stripper according to the manufacturer’s instructions. Wear heavy gloves and work in a well-ventilated area for safety. Spread the stripper thickly and let it sit until the old finish bubbles up and softens. Use a plastic scraper or putty knife to gently scrape away the goopy sludge, being careful not to gouge the wood underneath. For intricate details or crevices, a stiff nylon brush or steel wool can help remove stubborn bits of finish. This labor-intensive step is vital for revealing the bare wood that will accept the new stain.
Step 4: Sand the Wood to Perfection
Once the chemical stripper has done its job and the wood is dry, sanding is required to open the wood pores and ensure a smooth surface. Start with a medium-grit sandpaper, such as 120-grit, to remove any remaining finish and smooth out imperfections. Sand in the direction of the wood grain to avoid creating unsightly cross-grain scratches that will show up later. Follow this initial pass with a finer 220-grit sandpaper to polish the surface. Wipe away all sanding dust with a tack cloth or a vacuum with a brush attachment. A pristine, dust-free surface is essential when learning how to stain wood cabinets for an even, consistent color application.
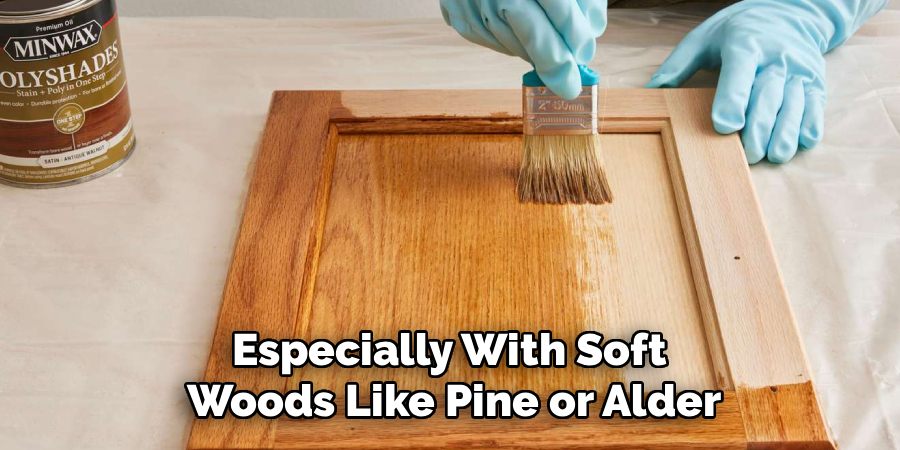
Step 5: Apply a Wood Conditioner
Many DIYers skip this step, but it is the secret to a professional-looking result, especially with soft woods like pine or alder. These woods tend to absorb stain unevenly, leading to a blotchy or splotchy appearance. A pre-stain wood conditioner penetrates the wood and helps to equalize the rate of absorption across the surface. Apply the conditioner with a brush or rag, coating the entire surface liberally. Let it soak in for the time specified on the can, usually about five to fifteen minutes, and then wipe off any excess. You should apply your stain within two hours of conditioning for the best effect.
Step 6: Apply the Stain in Thin Coats
Now comes the transformative moment of adding color. Stir your stain thoroughly to mix the pigments that have settled at the bottom. Using a natural bristle brush or a clean lint-free rag, apply the stain to the wood, working in small sections. Always follow the direction of the grain. Apply a generous amount, let it penetrate the wood for a few minutes, and then wipe away the excess with a clean rag. The longer you leave the stain on before wiping, the darker the color will be. It is better to apply multiple thin coats to build up the color gradually than one heavy coat that might not dry properly.
Step 7: Seal and Protect the Finish
After the stain has dried completely—usually overnight—you must seal the wood to protect it from moisture, heat, and grease. Polyurethane is the industry standard for kitchen cabinets because of its durability. You can choose a matte, satin, or gloss finish depending on your preference. Stir the polyurethane gently to avoid creating air bubbles, then apply a thin, even coat using a high-quality synthetic brush or a foam brush. Let the first coat dry, then lightly sand it with very fine 320-grit sandpaper to remove any dust nibs. Wipe it clean and apply a second or even third coat for maximum protection. This final step ensures your hard work lasts for years.
Step 8: Reassemble Your Cabinetry
Once the final coat of sealer has cured fully, which can take a few days depending on the product and humidity, it is time to put your kitchen back together. Retrieve your labeled bags of hardware and your numbered doors. Carefully reattach the hinges to the doors and then mount the doors back onto the cabinet frames. Slide the drawers back into their tracks and install your knobs or pulls. Take your time adjusting the hinges to ensure the doors hang straight and close properly. Stepping back to see the finished product is the ultimate reward for your patience and effort.

Frequently Asked Questions
Do I Have to Sand Before Staining?
Yes, sanding is absolutely non-negotiable for staining projects.
- Opening Pores: Wood pores need to be open to absorb the pigment. Old finishes seal these pores shut.
- Smoothness: Sanding removes scratches, dents, and old clear coats that would otherwise prevent the stain from penetrating.
- Adhesion: Even if the wood is bare, sanding ensures the surface is uniform, preventing blotchy color patches.
What Is the Best Stain for Kitchen Cabinets?
The best stain depends on the type of wood and your desired finish, but oil-based stains are generally preferred.
- Oil-Based Stain: Offers the richest color, deepest penetration, and longest working time, making it easier to avoid lap marks.
- Gel Stain: Excellent for vertical surfaces or woods that blotch easily (like pine) because it is thick and sits on the surface rather than soaking in deeply.
- Water-Based Stain: Dries very quickly and has low odor, but can raise the grain of the wood, requiring extra sanding.
How Long Does It Take for Stain to Dry?
Drying times vary significantly based on the type of stain and environmental conditions.
- Oil-Based: Typically requires 8 to 24 hours to dry completely before you can apply a sealer.
- Water-Based: Can dry in as little as 2 to 4 hours.
- Humidity: High humidity and low temperatures will extend drying times. Always check the can label and err on the side of waiting longer to avoid a sticky finish.
Can I Stain Over Painted Cabinets?
You cannot stain directly over paint; the paint must be completely removed first.
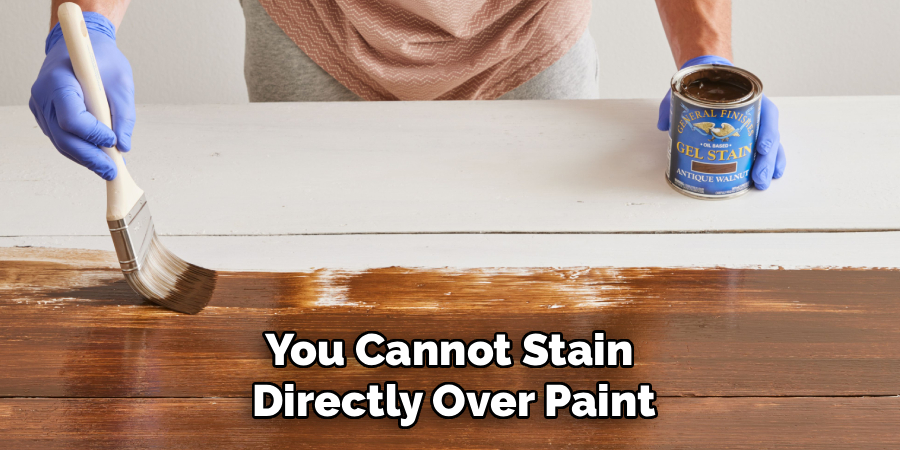
- Stripping Required: Stain needs to soak into wood fibers. Paint acts as a barrier that blocks this process.
- Labor Intensive: You must strip every bit of paint using chemical strippers and heavy sanding to get down to bare wood.
- Wood Condition: Sometimes, cabinets were painted because the wood underneath was low quality. Test a small area first to see if the grain is worth revealing.
Why Is My Stain Looking Blotchy?
Blotchiness is usually caused by uneven absorption of the stain into the wood fibers.
- Wood Species: Softwoods like pine, birch, and maple are notorious for blotching.
- Pre-Stain Conditioner: Failing to use a wood conditioner is the most common cause. This product regulates absorption.
- Sanding Issues: Uneven sanding or leftover finish residues can also cause patchy color. Ensure you sand the entire piece evenly with the same grit.
Conclusion
Revitalizing your kitchen cabinets with a fresh stain is one of the most impactful home improvement projects you can undertake. It breathes new life into your cooking space, adding value and warmth without the waste and expense of a full remodel. While the process requires elbow grease—particularly the cleaning and sanding stages—the steps are straightforward and forgiving. By taking the time to prepare the wood properly and applying thin, deliberate coats of stain and sealer, you ensure a finish that is both beautiful and durable enough to withstand the rigors of daily life.
Remember that patience is your best tool. rushing the drying times or skipping the conditioner can compromise the final look. Treat each door and drawer as its own small project, and soon enough, the collection will come together to form a stunning whole. Now that you have mastered how to stain wood cabinets, you can look around your home for other furniture pieces that might benefit from a similar makeover. The skills you have learned here will serve you well in countless DIY adventures to come.
About
Mike May is a distinguished figure in the world of woodworking and timber design, with a decade of expertise creating innovative and sustainable indoor solutions. His professional focus lies in merging traditional craftsmanship with modern manufacturing techniques, fostering designs that are both practical and environmentally conscious. As the author of Woodimber, Mike delves into the art and science of timber-craft, inspiring artisans and industry professionals alike.
Education
RMIT University (Melbourne, Australia)
-
Associate Degree in Design (Timber): Focus on sustainable design, industry-driven projects, and practical craftsmanship.
-
Gained hands-on experience with traditional and digital manufacturing tools, such as CAD and CNC software.
Nottingham Trent University (United Kingdom)
-
Bachelor’s in Woodworking and Product Design (Honors): Specialized in product design with a focus on blending creativity with production techniques.
-
Participated in industry projects, working with companies like John Lewis and Vitsoe to gain real-world insights.
Publications and Impact
In Woodimber, May shares his insights on timber design processes, materials, and strategies for efficient production. His writing bridges the gap between artisan knowledge and modern industry needs, making it a must-read for both budding designers and seasoned professionals.