 (1)")

There comes a moment in the life of every hardwood floor when its shine fades, its surface is marked by years of life, and its color no longer inspires. It’s a quiet decline. The rich luster that once defined a room has given way to a tired, worn-out appearance. The good news is that beneath that weathered surface, the original beauty of the wood is often waiting to be rediscovered.
A fresh coat of stain holds the power to completely transform a space, breathing new life into old floors and, by extension, your entire home. This project is not a simple weekend task; it demands a significant commitment of time and physical effort. However, the reward is substantial. This guide is designed to walk you through the entire process, offering a detailed roadmap on how to restain wood floors yourself, potentially saving a considerable amount of money while achieving results that can rival a professional job.
Assessing Your Wood Floors
Before a single drop of stain is purchased or a sander is rented, the first step is a careful and honest assessment of your existing floors. Not every wood floor is a suitable candidate for refinishing, and this initial analysis can save you from a costly and frustrating mistake. The goal is to determine if the floor can physically withstand the aggressive sanding process required to remove the old finish. This involves more than just a casual glance; it requires a bit of detective work to understand the material you’re dealing with.
Identifying Existing Damage
Your first task is to get down on your hands and knees and inspect the floor closely. Look for significant imperfections that go beyond simple surface scratches. Are there deep gouges from dropped objects or moved furniture? Do you see dark, ominous water stains near doorways or under windows? Pet stains, which often contain ammonia, can deeply discolor wood and may be impossible to sand out completely. In cases of severe damage, you might need to consider replacing individual boards before you can even think about staining. Ignoring these issues will only result in them being highlighted by the new finish.
Solid vs. Engineered Hardwood
It’s also essential to determine what kind of hardwood you have. The distinction between solid and engineered hardwood is fundamental to this project. Solid hardwood floors are just that—planks made from a single, solid piece of wood. They can typically be sanded and refinished multiple times throughout their lifespan. Engineered hardwood, on the other hand, consists of a thin top layer, or “wear layer,” of real hardwood bonded to a core of plywood or high-density fiberboard. The thickness of this wear layer is the critical factor.
If it’s too thin, attempting to sand it will chew right through to the core material, irreversibly ruining the floor. You can sometimes check this by removing a floor vent or a threshold piece to view a cross-section of a plank. If your floor is engineered, you must confirm that the wear layer is thick enough for another sanding; if you have any doubt, it may be best to consult a professional.
Gathering the Right Tools and Materials
Essential Project Materials
Beyond the big machines, a collection of smaller items is necessary. You will need plenty of clean rags for applying and wiping the stain, as well as tack cloths for dust removal. Wood filler matching the color of your chosen stain is needed for any small cracks or nail holes. Painter’s tape and plastic sheeting are essential for sealing off the room to contain the pervasive dust. A pry bar and hammer will be needed for removing the shoe molding and setting any protruding nails.
Choosing Your Stain and Finish
Finally, you must select your stain and the protective topcoat. Stains are generally available in oil-based and water-based formulas. Oil-based stains tend to penetrate deeper and offer richer colors, but they have a strong odor and take much longer to dry. Water-based stains have low odor, dry quickly, and offer easy cleanup, but they can sometimes raise the grain of the wood.
Your choice of stain will influence your choice of polyurethane. You must use a compatible system; for instance, while you can apply an oil-based polyurethane over a water-based stain, the reverse is often not recommended. The topcoat is what provides the durability and sheen, so choose a high-quality, floor-grade polyurethane designed to withstand foot traffic.
Preparing the Space
With your materials gathered, the next phase involves meticulously preparing the room itself. This step is about two things: creating a completely clear workspace and protecting the rest of your home from the unavoidable mess of the project. Dust from sanding is incredibly fine and will infiltrate every unprotected nook and cranny if you let it.
Start by removing every single item from the room. This includes all furniture, rugs, and even window treatments. The space needs to be an empty shell. Once the room is clear, you must seal it off from the rest of the house. Use painter’s tape and plastic sheeting to cover all doorways. It’s also a wise idea to seal off any HVAC vents—both supply and return—in the room to prevent dust from being circulated throughout your home’s ventilation system.
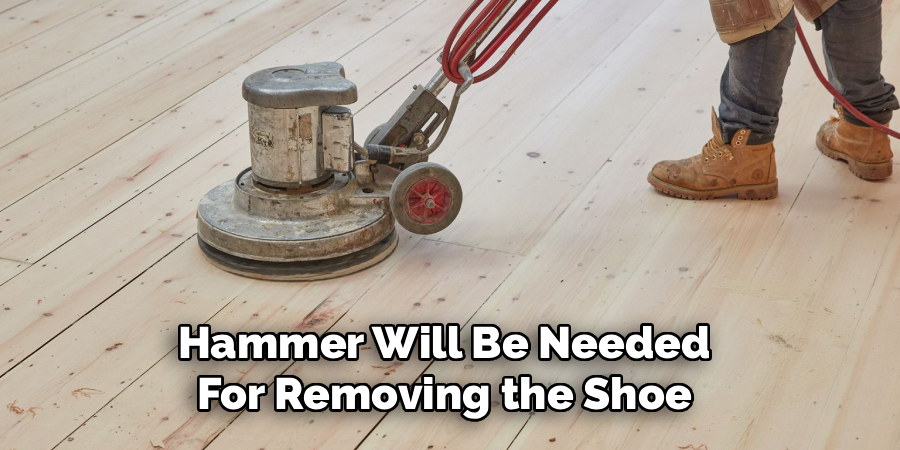
Removing Shoe Molding
The small piece of trim that runs along the bottom of your baseboards, known as shoe molding or quarter-round, needs to be removed. This allows the edge sander to get as close as possible to the baseboard. To remove it without breaking it, use a utility knife to score the caulk line where the molding meets the baseboard. Then, gently work a flat pry bar behind the molding, using a small piece of scrap wood as a fulcrum to protect the baseboard from damage. Work your way along the wall, prying a little at a time. Label the back of each piece as you remove it so you know exactly where it goes during reassembly.
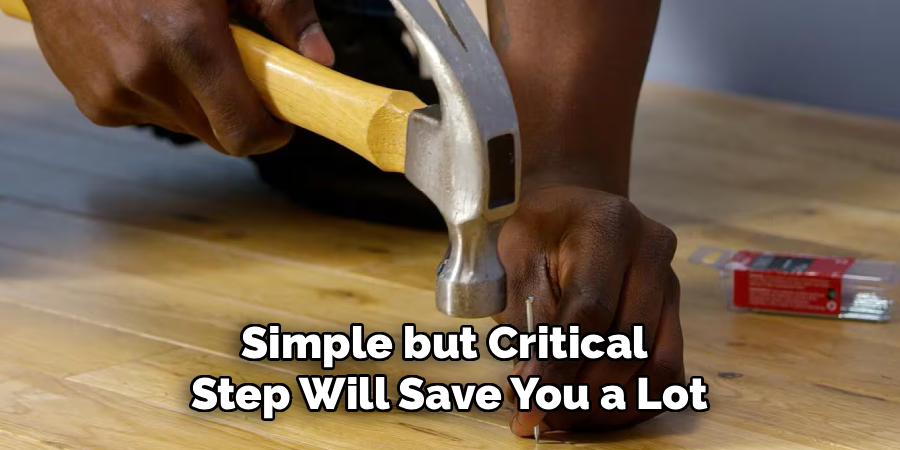
Counter-Sinking Nails
Before you can start sanding, you need to ensure the floor surface is free of any metal protrusions that could tear your expensive sandpaper or damage the sander itself. Walk the entire floor and look for any nail heads that are sitting flush with or sticking up from the surface. Use a nail set and a hammer to tap each of these nails about 1/8 of an inch below the surface of the wood. This simple but critical step will save you a lot of time and frustration once the machines are running.
How to Restain Wood Floors: Step-by-Step Guide
This is where the transformation truly begins. The process of sanding, staining, and finishing is a sequence of methodical steps, each building upon the last. Rushing any part of this process or taking shortcuts will almost certainly compromise the final quality of your floor. Patience is your most valuable tool. From the aggressive first pass of the sander to the final wipe of the stain, every action requires care and attention to detail.
Step 1: Sanding the Old Finish
Sanding is the most labor-intensive and critical part of the entire project. The goal is to remove the old finish and a very thin layer of the wood itself to expose a fresh, clean surface. You will start with the drum sander fitted with the coarsest grit sandpaper, usually 36- or 40-grit. Always move the sander in the same direction as the wood grain, never across it. Start the sander with the drum lifted off the floor, and gently lower it as you begin to move forward.
Never stop moving while the drum is in contact with the floor, or you will create a divot. Make overlapping passes, covering the entire field of the room. After the first pass, you will switch to a medium grit (60- or 80-grit) and repeat the process, followed by a final pass with a fine grit (100- or 120-grit). Each successive grit removes the scratches left by the previous one.
Step 2: Edging and Corner Detailing
The drum sander cannot reach the perimeter of the room. For this, you will use the edge sander. This powerful handheld machine requires a firm grip and a steady hand. Just like with the drum sander, you will work through the same progression of grits, from coarse to fine, blending the edges with the main field of the floor. Keep the edger moving in a sweeping, arcing motion to avoid creating dips or swirls. For the tightest corners where even the edger can’t reach, a sharp paint scraper or a detail sander will be necessary to remove the last remnants of the old finish.
Step 3: Vacuuming and Tack-Clothing
Before you can even think about applying stain, every last particle of dust must be removed from the room. A perfectly clean surface is paramount for a smooth, even finish. Start by using a shop vacuum with a brush attachment to thoroughly vacuum the floors, walls, and window sills. After vacuuming, you will need to use tack cloths—sticky cheesecloths designed to pick up fine dust.
Wipe the entire floor methodically, refolding the cloth frequently to expose a clean surface. You may need to do this two or three times to achieve a completely dust-free surface. When you can wipe your hand on the floor, and it comes up perfectly clean, you are ready.
Step 4: Water-Popping the Grain (Optional)
For homeowners desiring a deeper, darker, or more uniform color, a technique called “water-popping” can be employed. This involves lightly dampening the floor with a rag or a fine mist of distilled water after the final sanding. The water causes the wood fibers to swell and opens up the grain, allowing the wood to absorb more stain. This is particularly effective on tight-grained woods like maple. It’s an optional step, but one that can yield a more professional and dramatic result. The floor must be allowed to dry completely before the stain is applied.
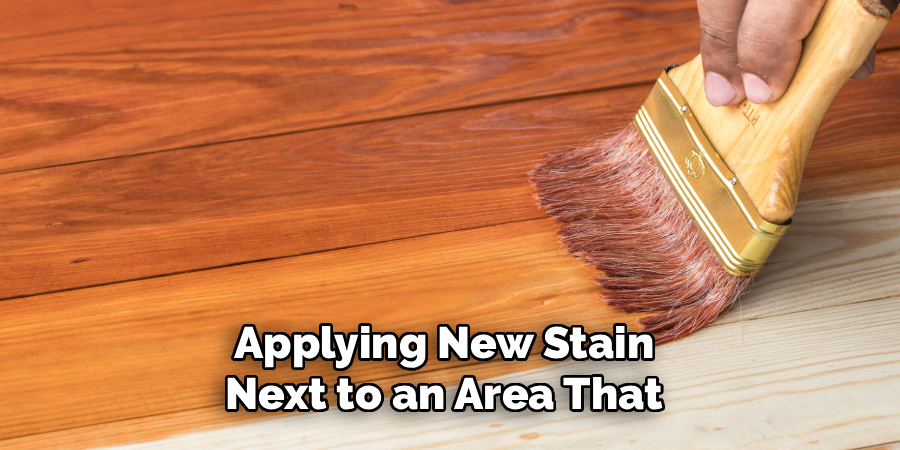
Step 5: Applying the Wood Stain
With the floor perfectly prepped, it’s time to apply the color. The key to this step is to work in small, manageable sections. Using a clean rag, a foam brush, or a specialized applicator pad, apply a liberal amount of stain to a section of the floor, always working in the direction of the wood grain. Work quickly but carefully to maintain a “wet edge,” meaning you should always be applying new stain next to an area that is still wet. This prevents lap marks where sections have dried at different rates.
Step 6: Wiping Away Excess Stain
The stain’s purpose is to color the wood, not to form a film on top of it. After letting the stain penetrate for the time recommended by the manufacturer (usually 5-15 minutes), you must wipe away all the excess. Using clean, dry rags, wipe the surface firmly, again moving in the direction of the grain. Any stain left to dry on the surface will become a sticky, uneven mess that will prevent the polyurethane from adhering properly. The goal is to leave pigment in the wood, not on it.
Step 7: Allowing Proper Drying Time
Patience is crucial now. The stain must be allowed to dry completely before you can apply the protective topcoat. Drying times vary significantly based on the type of stain (oil or water-based), as well as the ambient temperature and humidity. Rushing this step and sealing in a wet stain can lead to a catastrophic finish failure. Refer to the manufacturer’s instructions and err on the side of caution. If it feels even slightly tacky, it needs more time.
Sealing with a Protective Finish
The stain provides the color, but the polyurethane topcoat provides the protection. This clear finish is what will stand up to foot traffic, spills, and daily life, protecting the beautiful color you just applied. Applying it smoothly and correctly is the final step in achieving a professional-looking floor.
As with stains, polyurethane comes in oil-based and water-based formulas, each with its own application characteristics. Oil-based polyurethane tends to have a slightly amber hue that can warm up the color of the wood, while water-based formulas are typically crystal clear and will not alter the color.
The First Coat
The goal when applying polyurethane is to lay down a smooth, even coat without introducing bubbles. A T-bar applicator with a lambswool cover is a popular tool for this job. Pour a line of polyurethane along one wall and use the applicator to pull the finish across the floor in a smooth, steady motion, always working with the grain. Overlap each pass slightly and work your way systematically out of the room. Avoid overworking the finish, as this can create bubbles. Once the first coat is down, you must let it dry completely according to the manufacturer’s instructions.
Sanding Between Coats
For the best possible finish, you will need to apply at least two, and preferably three, coats of polyurethane. To ensure proper adhesion between coats, you must lightly abrade the surface after each coat has dried. This is not aggressive sanding; it’s a light “buffing” or “screening.” Using a very fine-grit abrasive screen (220-grit) on a pole sander, lightly scuff the entire surface of the floor. The goal is just to knock down any dust nibs and create a microscopic texture for the next coat to grip. After screening, you must thoroughly vacuum and tack the floor again before applying the next coat.
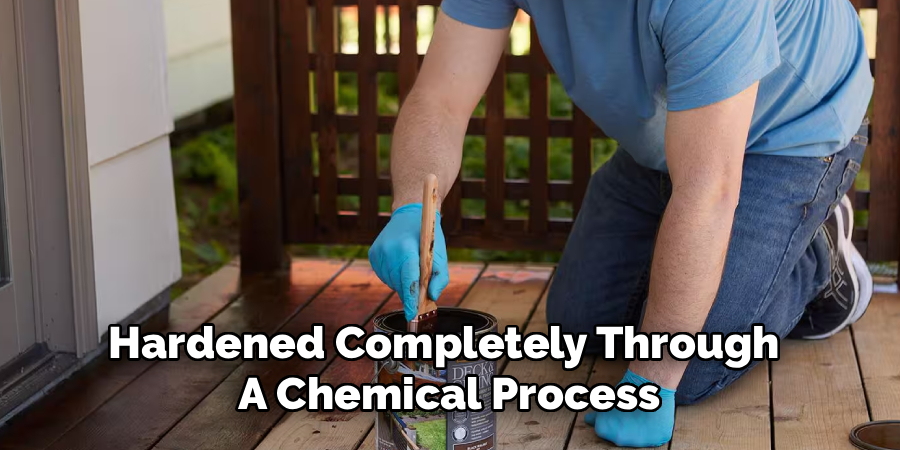
Curing and Reassembly
You’ve applied the final coat, and the floor looks spectacular. The temptation is to immediately move furniture back in and enjoy your new space, but this would be a grave error. The finish needs time, not just to dry, but to fully cure. There is a significant difference between the two. “Dry to the touch” means the solvents have evaporated, but “fully cured” means the finish has hardened completely through a chemical process.
Foot Traffic Guidelines
Follow the manufacturer’s recommendations for curing time. Generally, you can walk on the floor with socks after about 24 hours. You should wait several days before walking on it with shoes. The longer you can stay off the floor, the better. Allowing it to cure properly will result in a much harder, more durable finish that will last for years.
Replacing Furniture and Rugs
You should wait at least 72 hours, and preferably a full week, before replacing furniture. When you do bring furniture back in, never drag it across the new finish. Lift and place each piece carefully. It is an excellent practice to apply felt pads to the bottom of all furniture legs to prevent scratches. It is also advised to wait even longer—at least one to two weeks—before laying down any area rugs. Placing a rug down too early can trap solvents and prevent the finish underneath from curing properly, leaving you with a soft spot in your otherwise perfect floor.
Long-Term Maintenance Tips
After investing so much time and effort into refinishing your floors, you’ll want to keep them looking their best for as long as possible. Proper long-term maintenance is straightforward and doesn’t require a lot of work, but it does require consistency. The key is to prevent the kind of abrasive grit and grime from accumulating that slowly dulls the finish over time.
Routine Cleaning
Your primary defense against a dull floor is frequent cleaning. Daily sweeping with a soft-bristle broom or dusting with a microfiber mop will remove the fine grit and dust that acts like sandpaper underfoot. For a deeper clean, a weekly damp-mopping is recommended. It is critical to use a cleaning product specifically formulated for hardwood floors and to wring the mop out until it is barely damp. Never flood the floor with water, as this can damage both the finish and the wood itself.
Preventing Damage
Proactive measures can go a long way in preserving your floor’s beauty. Placing high-quality doormats at all entryways will trap much of the dirt, sand, and water from shoes before it ever reaches your floor. Trimming your pets’ nails regularly will help prevent scratches. It’s also important to wipe up any spills immediately with a soft cloth before they have a chance to penetrate the finish or damage the wood. These simple habits will dramatically extend the life of your newly restained floors.
Conclusion
The journey of refinishing a hardwood floor is undeniably challenging, but the result is one of the most rewarding DIY projects a homeowner can undertake. The process transforms not just the appearance of a room but your relationship with it. You’ve erased years of wear and tear, customized the color to your exact taste, and restored the inherent warmth and character of the wood.
The financial benefit of doing it yourself is significant, but perhaps the greater reward is the deep satisfaction of knowing you did it right. Learning how to restain wood floors is more than just a home improvement task; it is a valuable skill that empowers you to breathe new life into your home, creating a beautiful foundation that you and your family will enjoy for many years to come.
About
Mike May is a distinguished figure in the world of woodworking and timber design, with a decade of expertise creating innovative and sustainable indoor solutions. His professional focus lies in merging traditional craftsmanship with modern manufacturing techniques, fostering designs that are both practical and environmentally conscious. As the author of Woodimber, Mike delves into the art and science of timber-craft, inspiring artisans and industry professionals alike.
Education
RMIT University (Melbourne, Australia)
-
Associate Degree in Design (Timber): Focus on sustainable design, industry-driven projects, and practical craftsmanship.
-
Gained hands-on experience with traditional and digital manufacturing tools, such as CAD and CNC software.
Nottingham Trent University (United Kingdom)
-
Bachelor’s in Woodworking and Product Design (Honors): Specialized in product design with a focus on blending creativity with production techniques.
-
Participated in industry projects, working with companies like John Lewis and Vitsoe to gain real-world insights.
Publications and Impact
In Woodimber, May shares his insights on timber design processes, materials, and strategies for efficient production. His writing bridges the gap between artisan knowledge and modern industry needs, making it a must-read for both budding designers and seasoned professionals.