 (1)")

A dining table often serves as the silent centerpiece of a home, a broad, flat stage for daily life. It bears witness to hurried breakfasts, elaborate holiday meals, and late-night conversations. Over time, this constant use exacts a toll. The original lustrous finish, once clear and reflective, can become a tapestry of scratches, water rings, and sun-faded patches.
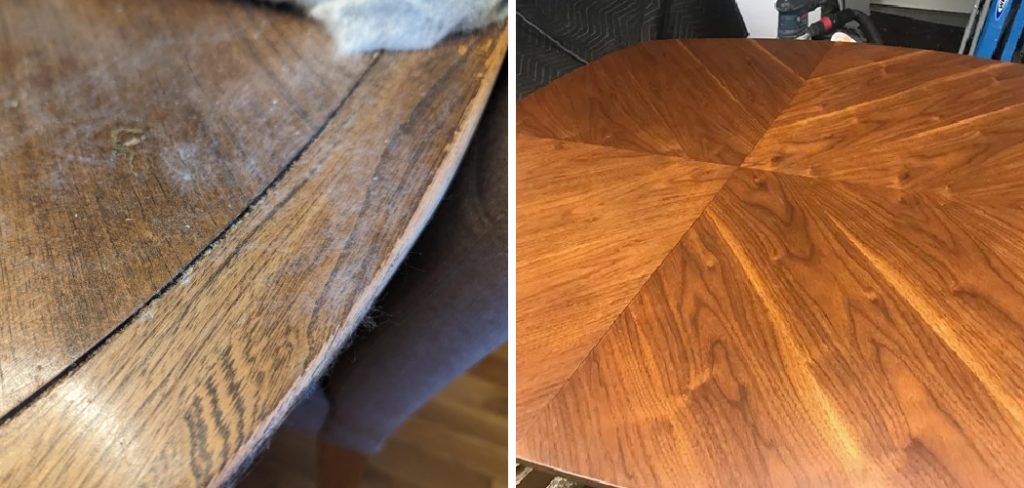
When faced with such a decline, many homeowners assume the piece is ruined, particularly if it’s made not of solid wood but of veneer. The idea of refinishing this thin surface can seem perilous. Yet, with a methodical approach and a clear understanding of the material’s limitations, it is entirely possible to restore its former elegance. This guide will provide a detailed framework for just that, explaining how to refinish wood veneer table top surfaces without causing irreparable damage, transforming a tired piece back into an object of pride.
Understanding the Material: What is Wood Veneer?
Before any restoration attempt, one must first develop an analytical respect for the material itself. A fundamental error in furniture work involves treating all wood surfaces as identical. They are not. Wood veneer is a remarkably thin slice of real, often beautifully figured hardwood, adhered with industrial-strength glue to a core substrate.
This core is typically a less expensive and more dimensionally stable material like medium-density fiberboard (MDF), particleboard, or a less attractive solid wood. This construction method allows manufacturers to produce furniture with the exotic appearance of rare woods at a fraction of the cost.
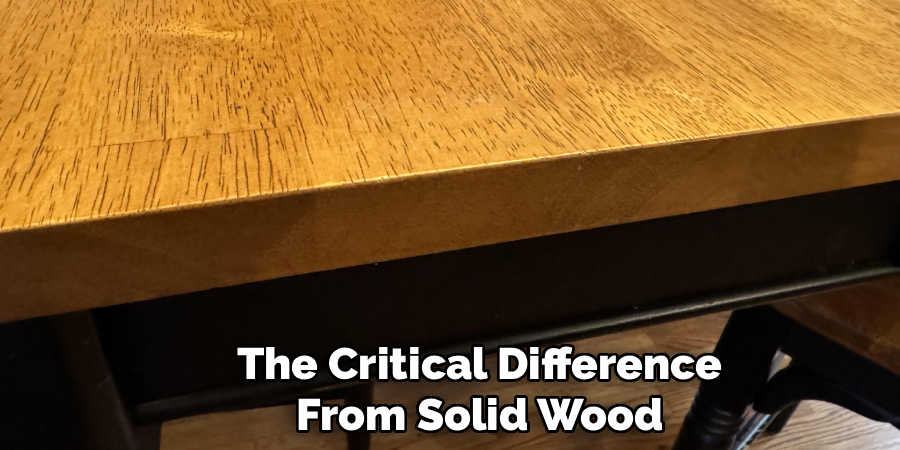
The Critical Difference from Solid Wood
The distinction between a veneered surface and a solid wood surface dictates the entire restoration strategy. Solid wood is forgiving. If a solid oak tabletop sustains a deep gouge, a craftsperson can aggressively sand or plane away a significant amount of material to reveal a pristine layer underneath. Veneer offers no such luxury. The decorative hardwood layer is often less than a millimeter thick.
This thinness is the primary constraint of the project. Aggressive mechanical sanding, which is a standard procedure for solid wood, can tear through a veneer layer in seconds, exposing the crumbly, unattractive particleboard core. This is a catastrophic failure, and one that is exceptionally difficult to disguise. Therefore, refinishing veneer is less about brute-force removal and more about delicate surface preparation and chemical finesse.
How to Confirm You’re Working with Veneer
It is essential to confirm that your table is indeed veneered before you begin. Misidentifying the material can lead to disastrous choices. You can usually identify veneer by examining the edges of the tabletop. On a solid wood piece, the end grain will show the continuation of the wood’s growth rings. On a veneered top, you will likely see a seam or a thin line where the top layer meets the edge banding or core.
Another clue is the grain pattern. Since veneer is sliced sequentially from a single log, you might notice repeating or “book-matched” patterns across the surface, an arrangement that is highly improbable in solid wood construction. Checking the underside of the table can also be revealing; the grain pattern underneath will almost always be different from the premium wood used on the top surface.
Assessing the Damage and Planning Your Approach
Once you have confirmed you are dealing with veneer, the next step is a careful and honest assessment of the damage. The type and severity of the imperfections will determine whether a full refinish is necessary or if a less invasive restoration is possible. Not every flaw requires stripping the entire surface.
Identifying Surface-Level vs. Deep Damage
Get down to eye level with the tabletop and inspect it under a strong, angled light. Differentiate between problems in the finish and problems in the wood itself. Minor scratches, a hazy or cloudy appearance, and light water rings that appear white are often issues confined to the topcoat of lacquer or varnish.
These can sometimes be resolved with less aggressive methods. However, deep scratches that have penetrated the finish and cut into the wood, dark black stains that indicate water has reached the tannins in the wood, or areas where the veneer is lifting, bubbling, or missing entirely will almost certainly require a full refinish.
The Question of Stripping vs. Sanding
You have two primary methods for removing the old finish: chemical stripping or mechanical sanding. Chemical strippers are gels or liquids that dissolve the old lacquer, allowing it to be scraped away.
This method can be effective but is messy, requires heavy ventilation due to toxic fumes, and the harsh chemicals can sometimes damage the old glue holding the veneer down. For most DIY projects, a careful, methodical sanding is often the more controlled approach, provided it is done correctly. We will focus on this sanding method, as it offers more tactile feedback and a lower risk of collateral damage when executed with patience.
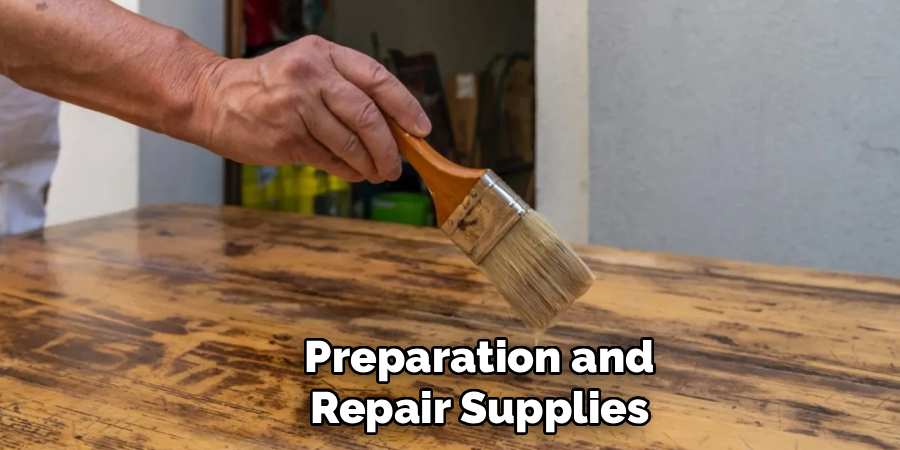
Gathering Your Tools and Materials for the Refinish
A successful refinishing project is built on meticulous preparation, and a significant part of that involves assembling the right tools before you begin. Stopping mid-project for a hardware store run is inefficient and breaks concentration. This particular task requires a specific set of tools and materials designed for delicate work.
Preparation and Repair Supplies
Your primary concern is the safe removal of the old finish and repair of the underlying surface. You will need a random orbital sander, as its motion is less aggressive than a belt sander. Equally important is a range of sandpaper grits for this sander, starting no coarser than 120-grit and progressing up to 220-grit.
For repairs, you will need a good-quality wood filler that matches the general tone of your wood, a flexible putty knife, and potentially some wood glue and clamps for loose veneer. You will also need plenty of clean rags and, most importantly, tack cloths for dust removal.
Staining and Finishing Products
The choice of stain and topcoat will define the final look and durability of your table. If you wish to change the color, you will need a wood stain. For a tabletop, an oil-based penetrating stain often provides a richer, more even color than a water-based alternative, though it takes longer to dry. The most critical component for a table is the protective topcoat. You must choose a high-durability finish designed to resist water, heat, and abrasion.
A high-quality oil-based or water-based polyurethane is the standard choice. Water-based polyurethanes offer the advantage of being crystal clear, low-odor, and fast-drying, while oil-based versions offer a slightly warmer amber tone and are often considered marginally more durable. For application, you will need high-quality natural bristle brushes (for oil-based finishes) or synthetic brushes (for water-based finishes), or a foam applicator for a smooth, brush-stroke-free finish.
How to Refinish Wood Veneer Table Top: Step-by-Step Guide
Here we arrive at the core of the project. This process is a sequence of methodical steps, each building upon the last. Rushing any part of this sequence, particularly the sanding, will almost certainly compromise the final quality of your tabletop. Patience and a light touch are your most valuable assets.
Step 1: Meticulous Cleaning and Degreasing
Before you sand, you must thoroughly clean the surface. Tabletops accumulate years of furniture polish, oils from human hands, and airborne grease. Sanding over this grime will drive the contaminants deeper into the wood grain.
Scrub the entire tabletop with a solution of a gentle degreaser, such as a TSP substitute, and water. After scrubbing, wipe the surface down with a clean, water-dampened cloth to remove any chemical residue. Let the table dry completely.
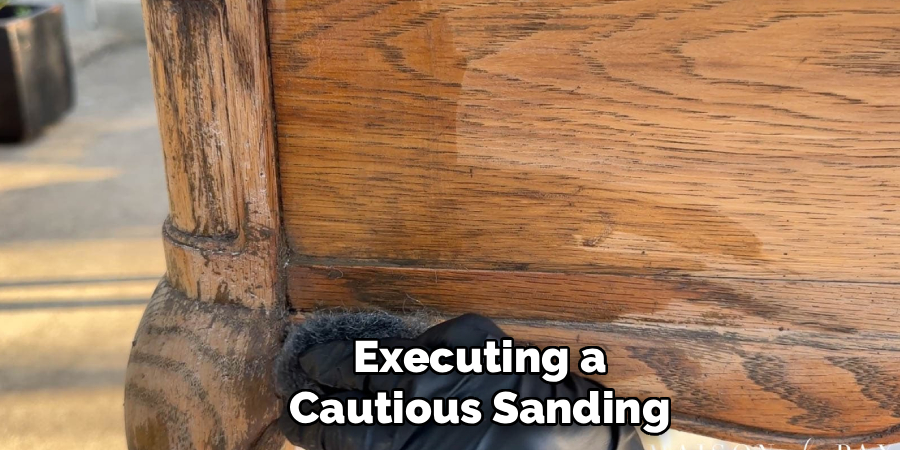
Step 2: Executing a Cautious Sanding
This is the most critical and perilous step. The goal is to remove only the old layer of finish without touching the thin veneer beneath it. Start with 120-grit sandpaper on your random orbital sander. Keep the sander flat on the surface and constantly in motion. Never press down; let the weight of the tool do the work. Do not linger in one spot, as this can quickly burn through the veneer.
Work your way across the entire surface, moving with the grain as much as possible. You will see the old, glossy finish turn into a fine, powdery dust. After the first pass, switch to a 150-grit or 180-grit paper and repeat the process to remove the finer scratches from the previous grit. Finally, finish with a 220-grit paper for a silky-smooth surface ready for stain.
Step 3: Repairing Imperfections
With the old finish removed, any physical damage to the veneer will be clearly visible. For small chips or gouges, use your flexible putty knife to press wood filler firmly into the void. Overfill it slightly to account for shrinkage as it dries.
Once hardened, carefully sand the filler flush with the surrounding veneer. For areas where the veneer is lifting or bubbling, you may need to carefully inject wood glue under the loose section with a syringe, then press it flat with a heavy weight or clamp (using a block of wood to distribute the pressure) until the glue cures.
Step 4: Final Dust Removal
Before any stain or finish can be applied, the surface must be analytically clean. Even a single speck of dust will create a blemish in the final topcoat. Start by vacuuming the entire surface with a soft brush attachment.
After vacuuming, use a tack cloth—a sticky, resin-impregnated cheesecloth—to wipe down the entire tabletop. Wipe gently in long, overlapping strokes. You will be surprised at how much fine dust the tack cloth picks up. When you can run your hand over the surface, and it comes up perfectly clean, you are ready for the next stage.
Step 5: Applying Stain (If Desired)
If you are happy with the natural color of the veneer, you can skip this step. If you want to change the color, now is the time to apply the stain. Using a clean, lint-free rag, apply the stain liberally to the surface, working in the direction of the grain. Work in manageable sections to maintain a “wet edge” and avoid lap marks.
Let the stain penetrate for the time recommended by the manufacturer, typically 5 to 15 minutes. The longer it sits, the darker the color will be. After the penetration time, use clean rags to wipe away all the excess stain. It is critical to remove any stain that has not been absorbed into the wood. Stain left on the surface will become a sticky film that prevents the polyurethane from adhering.
Step 6: Applying the Protective Topcoat
The clear topcoat is what will give your table its durability and sheen. Stir your polyurethane gently but thoroughly; shaking it will create bubbles that will mar your finish. Using a high-quality brush or foam applicator, apply a thin, even coat of polyurethane to the tabletop, working in long, smooth strokes in the direction of the grain.
Avoid over-brushing, as this can also introduce bubbles. The key is a thin coat. After the first coat is applied, you must let it dry completely according to the manufacturer’s instructions. This may take several hours.
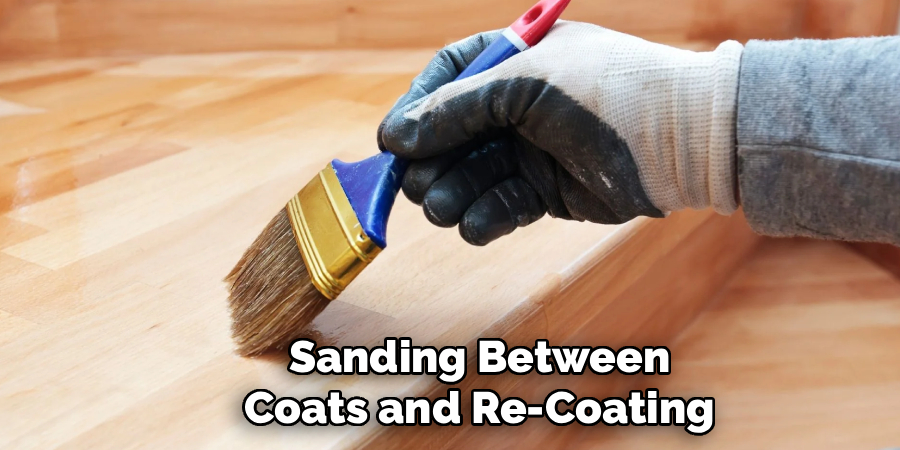
Step 7: Sanding Between Coats and Re-Coating
For a perfectly smooth and durable finish, you must apply multiple coats—at least three are recommended for a high-use tabletop. To ensure proper adhesion between these coats, you need to lightly sand the surface after each coat has dried (except for the final coat).
Using a very fine-grit sandpaper (220-grit or higher) or a fine sanding sponge, lightly scuff the entire surface. The goal is not to remove the finish you just applied, but simply to knock down any dust nibs and create a microscopic texture for the next coat to grip. After this light sanding, you must again thoroughly remove all dust with a vacuum and tack cloth before applying the next thin coat of polyurethane. Repeat this process for each subsequent coat.
Curing and Final Care
After applying the final topcoat, the project is nearly complete, but your patience is required for one last, critical phase: curing. There is a vast difference between a finish that is “dry to the touch” and one that is fully “cured.” Drying is the evaporation of solvents, while curing is a chemical process where the polyurethane molecules cross-link to form a hard, durable film.
The Importance of Curing Time
This chemical hardening can take a significant amount of time. While the table might feel dry in a day, it may not be fully cured for a week or even longer, depending on the product, temperature, and humidity. During this time, the finish is still relatively soft and vulnerable. Avoid placing any objects on the table, especially heavy ones.
Do not use any cleaning products on it. Simply let it sit undisturbed in a clean, well-ventilated space. Rushing this final step can result in permanent indentations or marks in your otherwise flawless new finish.
Long-Term Maintenance
Once fully cured, your newly refinished tabletop will be highly resilient, but not indestructible. To maintain its beauty, use coasters for drinks and placemats for hot dishes. Clean up spills promptly with a soft, damp cloth. For regular cleaning, avoid harsh chemical sprays or abrasive cleaners. A simple wipe-down with a cloth lightly dampened with water is usually sufficient. By taking these simple precautions, you can ensure your hard work lasts for many years.
Conclusion
The prospect of altering a veneered surface can be intimidating, as the material’s fragility is well-known. However, the process is not one of brute force but of careful, deliberate action. By correctly identifying the material, assessing the damage with a critical eye, and proceeding with a gentle hand—particularly during the all-important sanding phase—a complete transformation is well within reach.
This project demands more patience than raw strength. The knowledge of how to refinish wood veneer table top surfaces is a valuable skill, empowering you to rescue and rejuvenate pieces that others might discard. The result is more than just a renewed piece of furniture; it is a testament to the satisfying power of thoughtful restoration, bringing a central piece of your home back to a life of beauty and function.
About
Mike May is a distinguished figure in the world of woodworking and timber design, with a decade of expertise creating innovative and sustainable indoor solutions. His professional focus lies in merging traditional craftsmanship with modern manufacturing techniques, fostering designs that are both practical and environmentally conscious. As the author of Woodimber, Mike delves into the art and science of timber-craft, inspiring artisans and industry professionals alike.
Education
RMIT University (Melbourne, Australia)
-
Associate Degree in Design (Timber): Focus on sustainable design, industry-driven projects, and practical craftsmanship.
-
Gained hands-on experience with traditional and digital manufacturing tools, such as CAD and CNC software.
Nottingham Trent University (United Kingdom)
-
Bachelor’s in Woodworking and Product Design (Honors): Specialized in product design with a focus on blending creativity with production techniques.
-
Participated in industry projects, working with companies like John Lewis and Vitsoe to gain real-world insights.
Publications and Impact
In Woodimber, May shares his insights on timber design processes, materials, and strategies for efficient production. His writing bridges the gap between artisan knowledge and modern industry needs, making it a must-read for both budding designers and seasoned professionals.